Improved LEGO Blacktron Invader
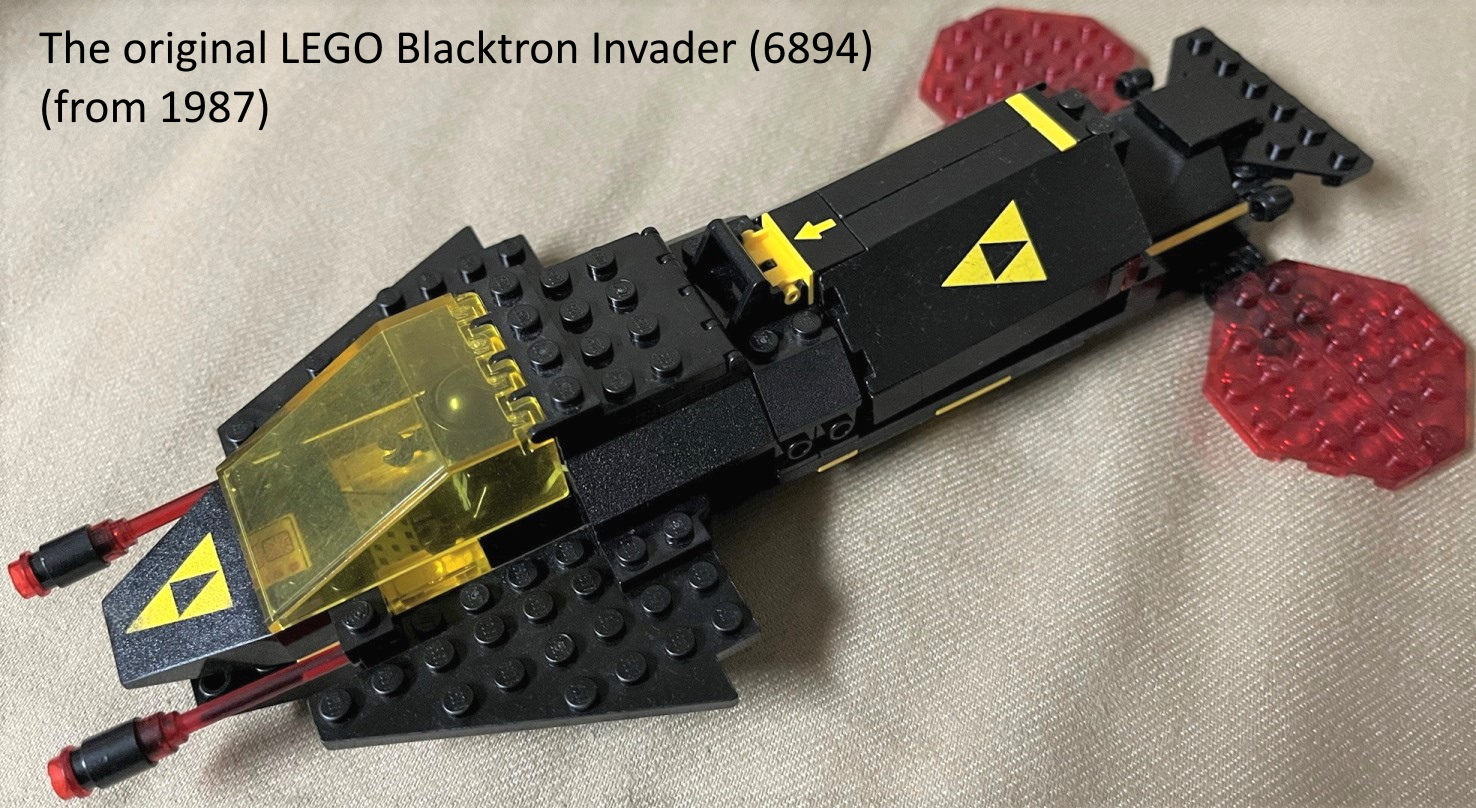
I fondly remember playing with LEGO set 6894 - Blacktron Invader when I was a child. I loved that it can easily split into three sections: cockpit, cargo, and thruster/power (and/or communications array) sections. There was even the possibility of mixing and matching some sections of this set with other Blacktron sets! I loved the LEGO Space sets but particularly liked the space pirate theme that the Blacktron series provided along with all the black with yellow/red highlights.
I remember imagining how to improve on this set's design; that small (2.5 studs long by 2 studs wide) empty space behind the pilot always bugged me when I was younger.
I started missing this set (because all my LEGO bricks went to my cousins during my late teen years) and this nostalgia kick prompted me to purchase this set (used) on Bricklink in October 2022.
This set I purchased has definitely been played with, judging by the play wear.
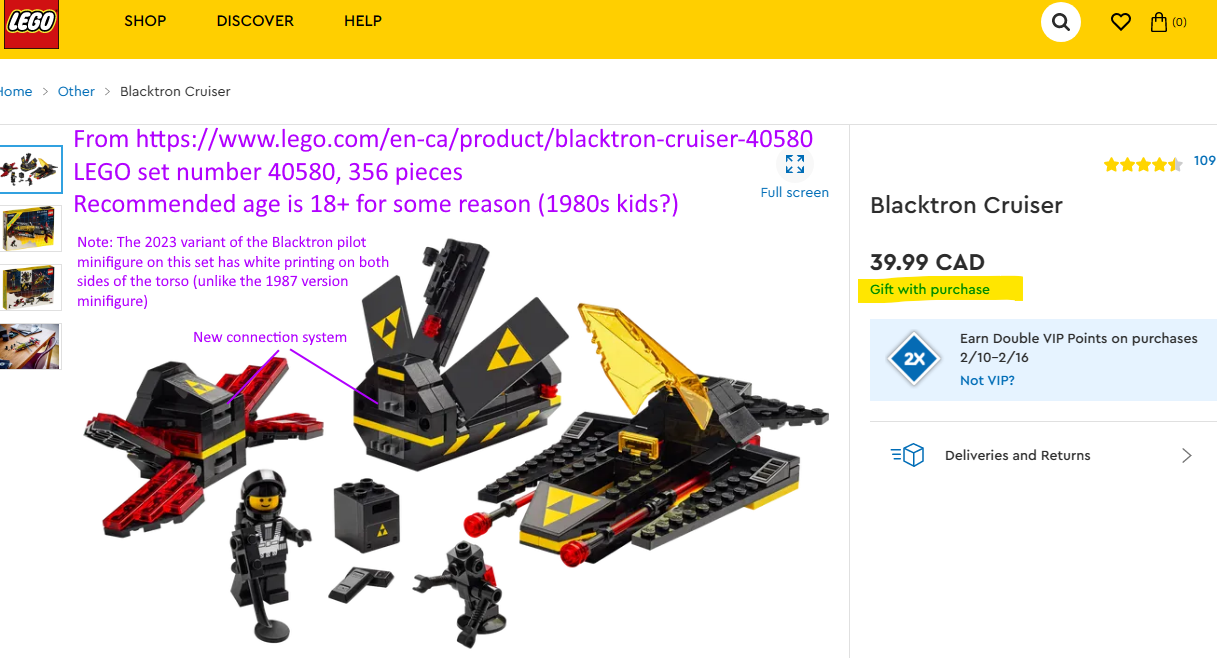
I saw that on January 1, 2023 a modern remake of this set called LEGO set 40580 - Blacktron Cruiser was made available as a gift (while supplies last) with any purchases over USD200/CAD250 at the LEGO shop.
A clever way to get people to buy after the Christmas season. I did not have any desire for any current LEGO offerings at the time so I passed on the opportunity.
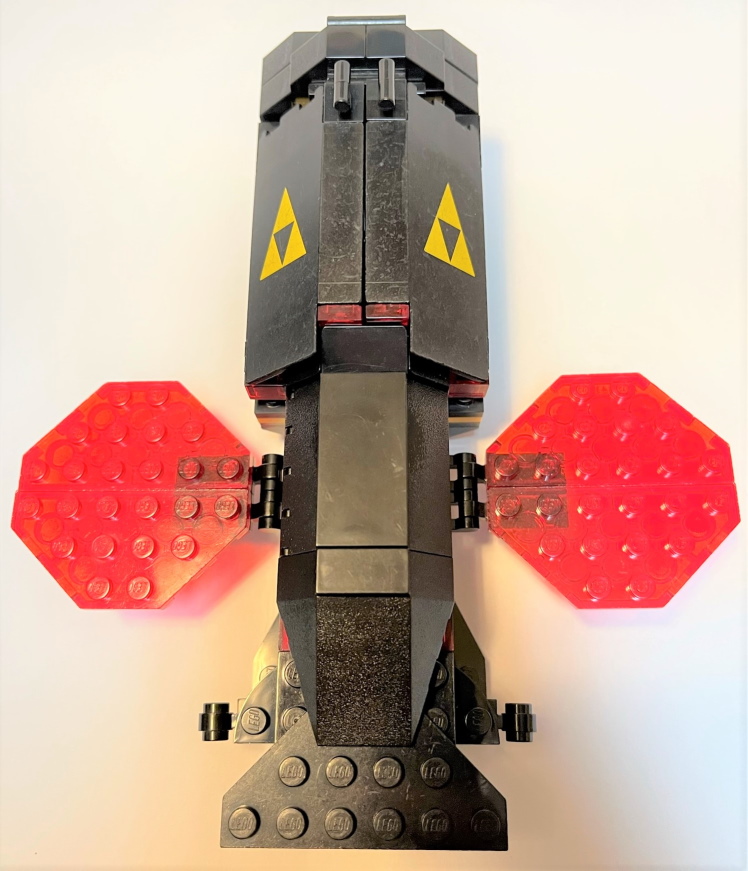
I also have minor quibbles about this set. I do not like the elongated cockpit section (the choice/availability of current windscreens was probably a factor, though I kind of like the metal detector storage area), the lack of those iconic trans-red plates that the Invader has. I get why all these compromises were done, but the cockpit is a bit visually jarring to someone wearing nostalgia goggles like myself. That Blacktron logo (an inverted Triforce; Nintendo had this a year prior (1986)) in the front is too big for the piece it sits on (if you have owned the original 6894 set).
I can get that set in the used market on Bricklink, but I passed on it. I would rather do what the younger me would've done if he had access to the modern parts (and Bricklink (and the Internet)) at his disposal: improve the existing 6894 set using a mix of older (use the existing windscreen, trans-red panels and cargo bay doors) and modern parts (hinges, curved tiles and inverted slope platforms).
Here was my wish list for this improvement project:
- See if I can increase the amount of space in the cockpit section while retaining the same footprint as the cockpit section of the original 6894 Invader, and preferably, the same look (something that newer pieces such as part 22889 can help with). Ideally have some living quarters back there for longer missions. If low on space, I can always imagine that the pilot seat can fold down into a bed.
- Use the same 2345p44 pieces but open them up like the space shuttle instead of the space-wasting one-hinge method that the existing 6894 model currently uses.
- Use more 22889 and some 60219 I already have on hand to increase the amount of space available while retaining the same footprint as the cargo section of the original 6894 Invader (and preferably the same look).
- Use the same connection points (same height, same location of pins and holes) to be 100% as compatible as the original 6894 would with connecting to other Blacktron sets. I have some help now with using 2458 as opposed to 4730.
- The one thing I like about the remake set 40580 is the separation of the thrust module from the (solar/communications) array module. I will separate the two as well on my model.
- The hinges holding the trans-red panels on the original 6894 are not the most reliable. One of them is losing its ability to retain the position of its other half. I will replace those older hinges with a modern hinge mechanism.
- The set has to be immediately recognizable as a love letter to the original 6894 Invader, and with the same or better style. For example, have better flow between the modules but NO CURVED SLOPES; retain the angular look using angular slopes.
- I learned who designed this set (Jens Nygaard Knudsen) and that he passed away in 2020 at the age of 78. This improved 6894 model is now an hommage to you, sir! Thanks for the fun you added to my childhood!
- The set has to be as swooshable (official LEGO term meaning that the build can be picked up by a kid (or grown adult) and waved around a room and the kid/adult makes flying and/or pew-pew noises if applicable) as the original 6894 Invader from 1987.
- Interesting note: During my childhood, LEGO had a strict "no-war" policy (to clarify: no modern weaponry (ex: tanks, guns); medieval/fantasy weapons in the Castle theme were tolerated). Space was meant to be a more peaceful, exploratory setting, and anything ressembling weapons on spaceships were designed as "sensor probes"... but to kids swooshing those models around, they were totally guns! pew pew! Then Blacktron and Space Police sets came around and loosened the rules a bit (futuristic fantasy weapons! pew pew!).
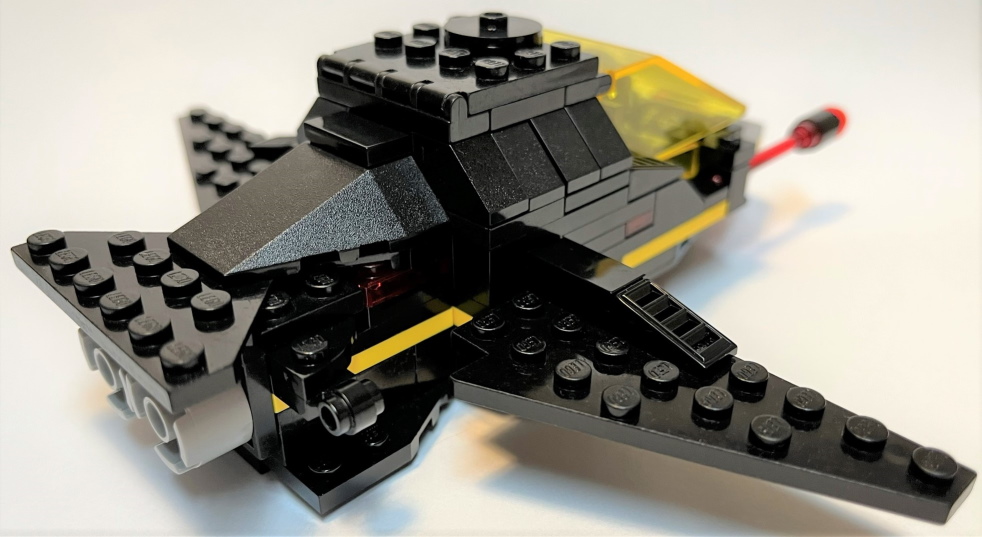
Anyway, here is the finished product (Click on each picture for a full-size version):
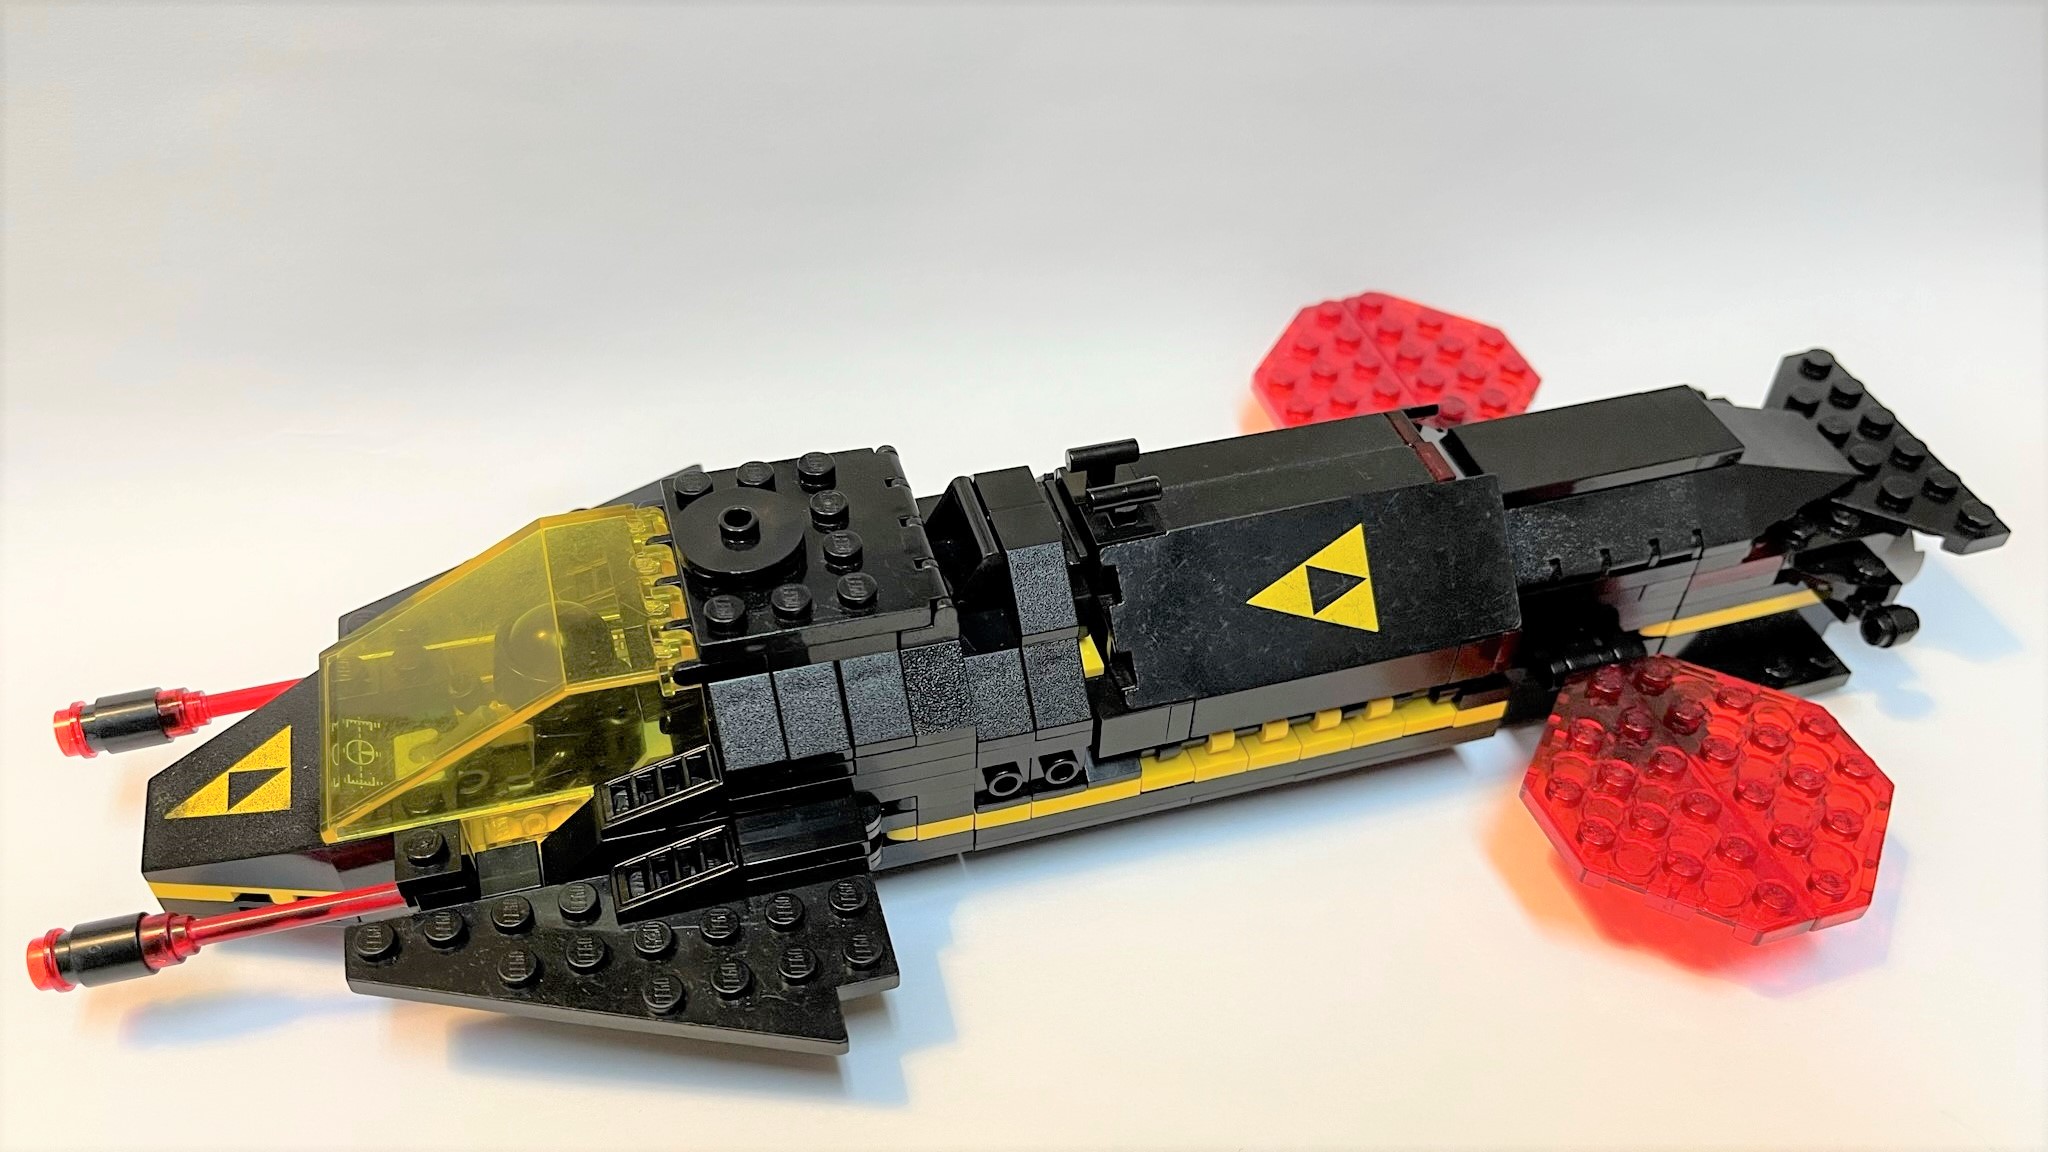
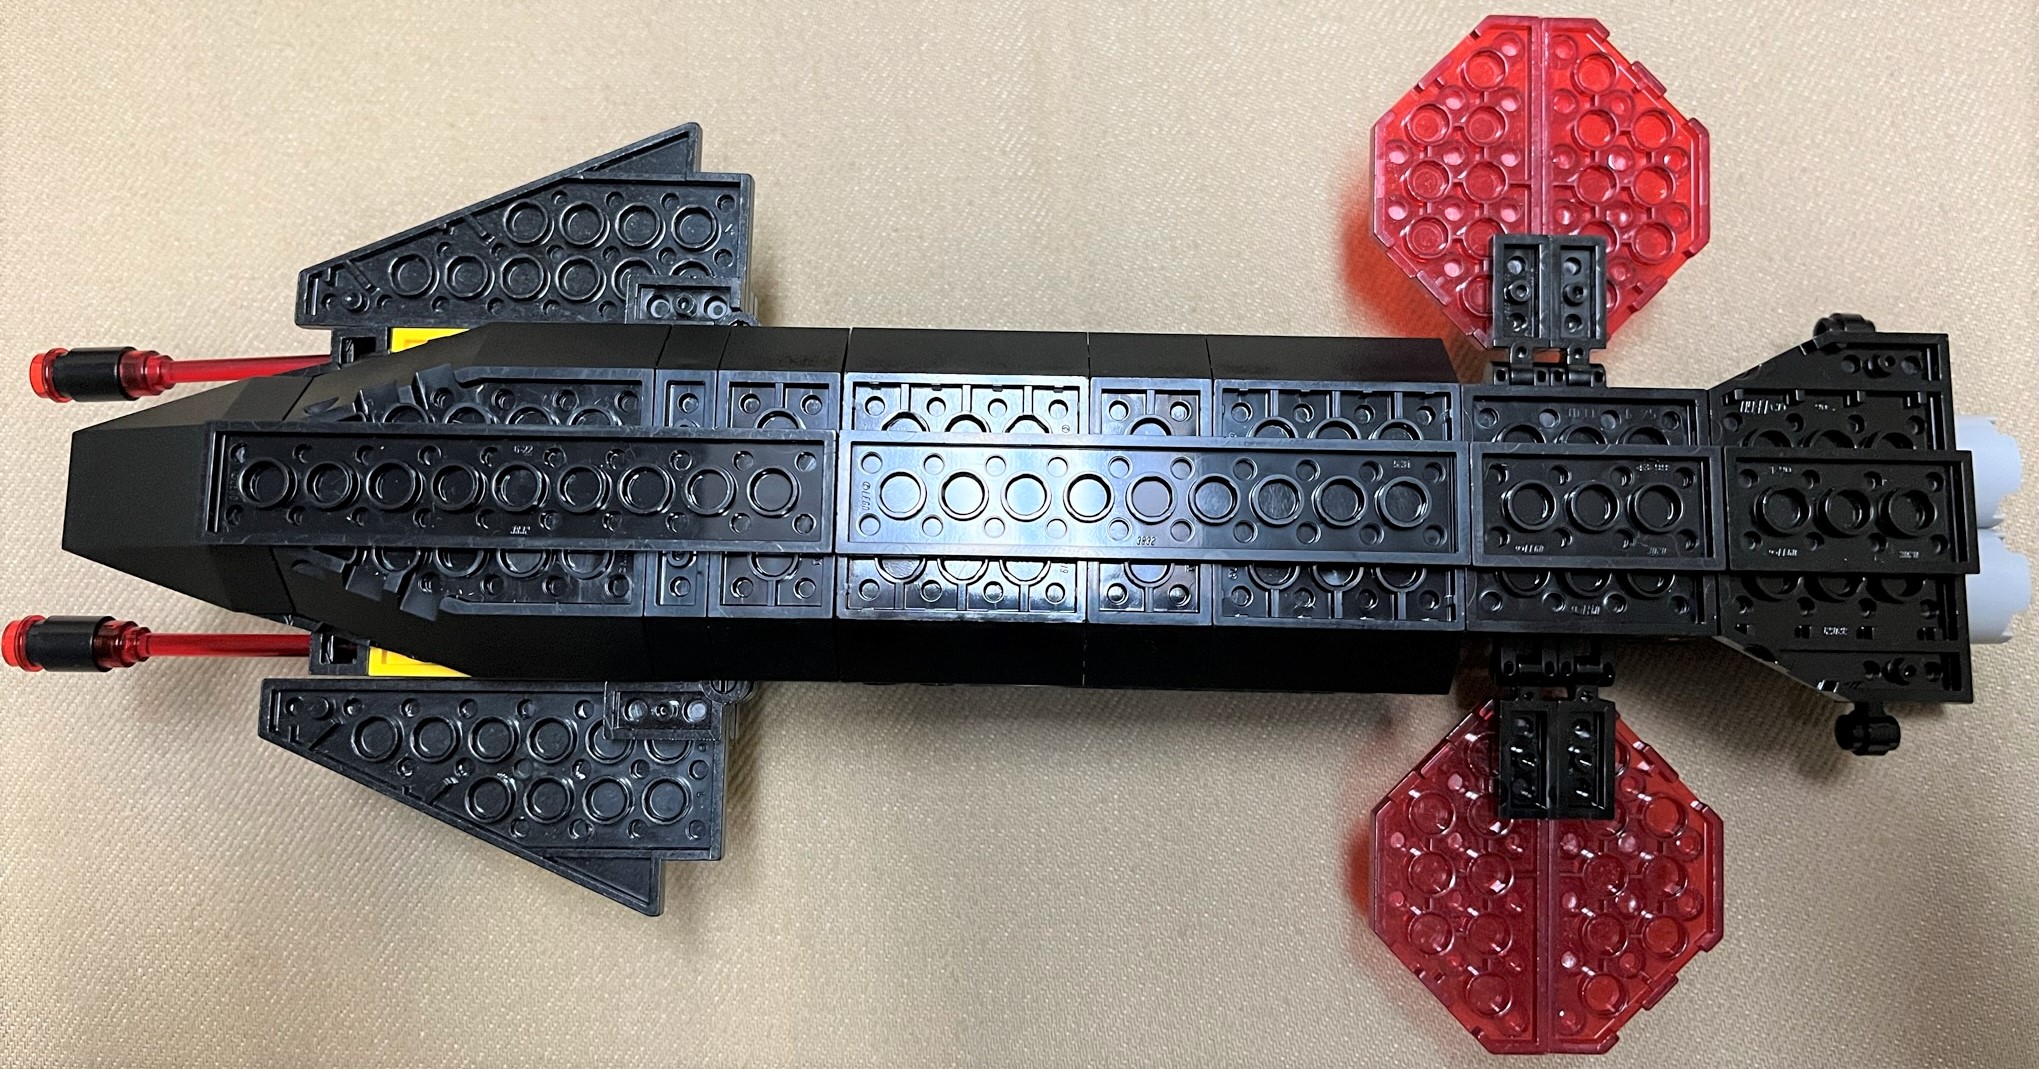
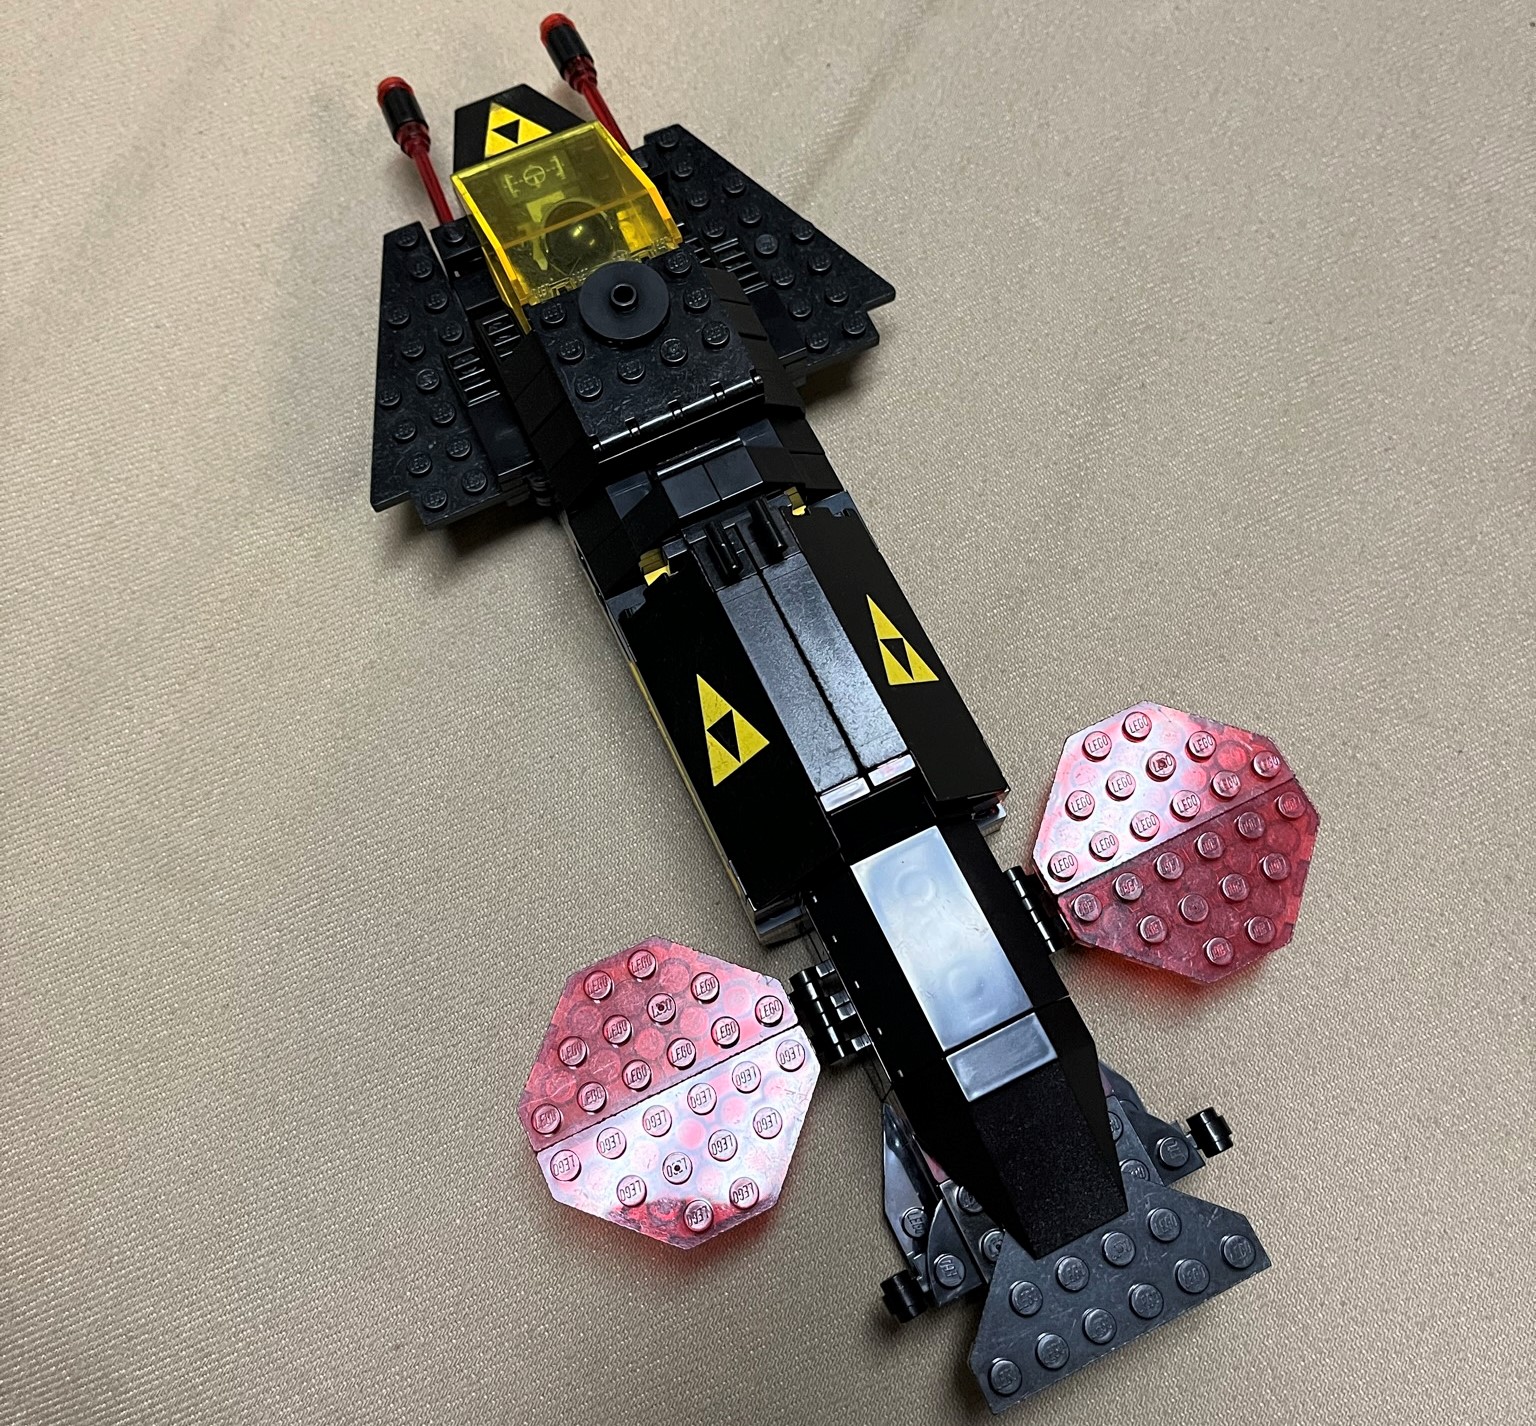
As you can see, the set is kept very close from the original, but with some improvements thanks to modern parts.
Let's dive deeper into the details of the different modules:
Cockpit module
(Click on each picture for a full-size version)
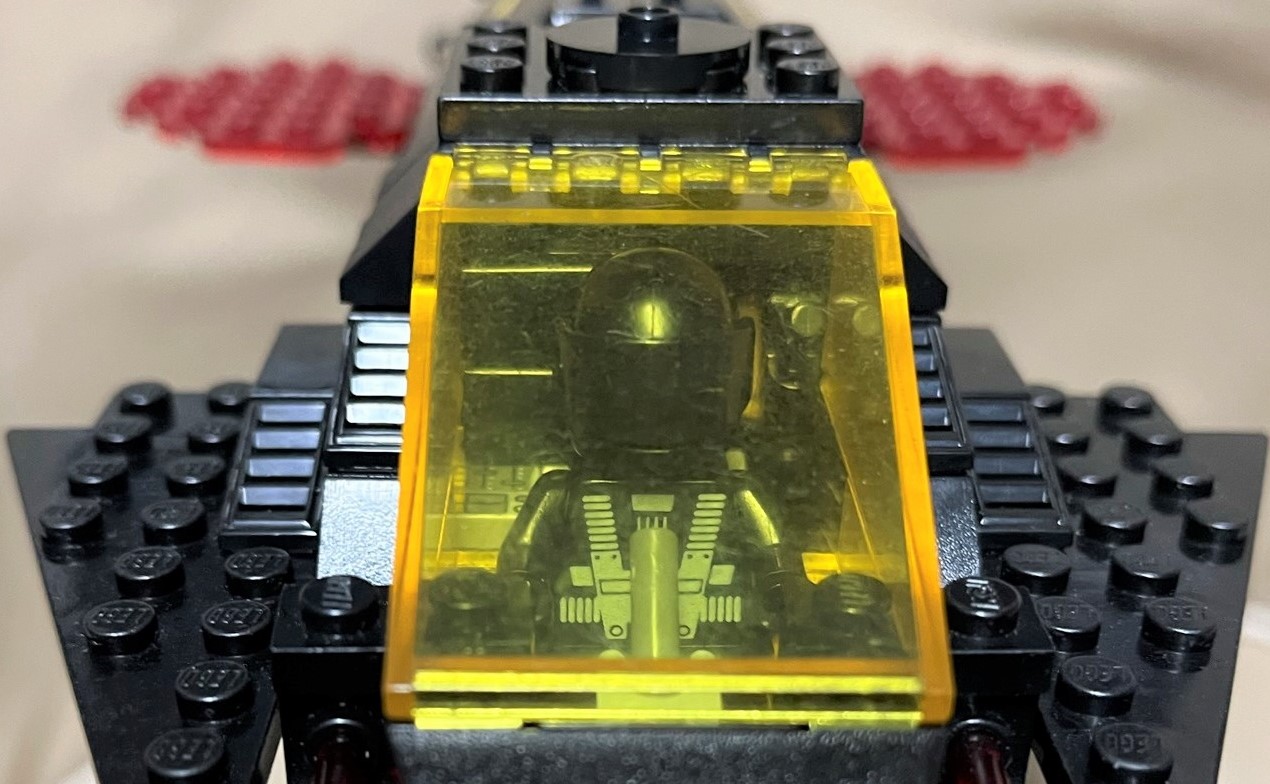 |
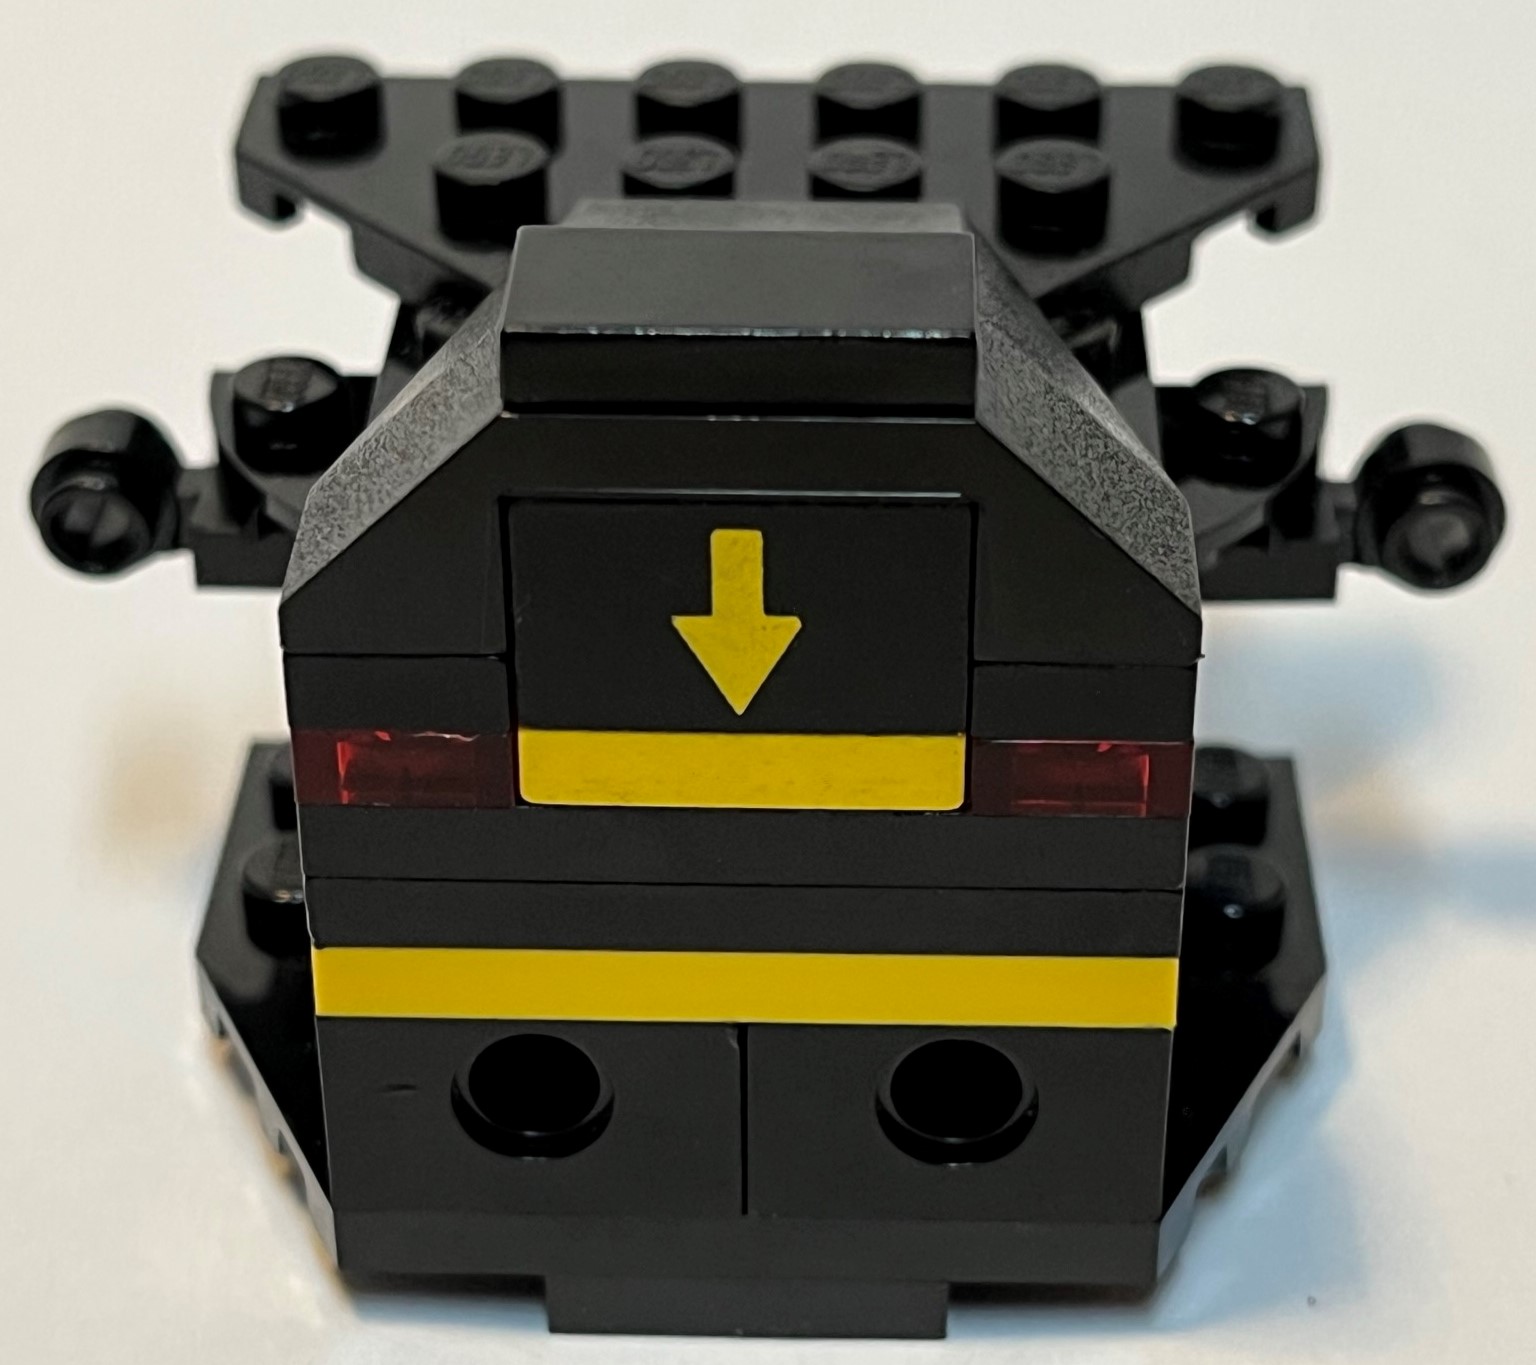
Looking at the ship head-on. You can (sort of; sorry about the heavy wear on the windscreen piece) see a partition behind the pilot covering half of the cockpit's width. You can also see that I have added a flight stick and a pistol (futuristic pistols are now available in LEGO, and the Blacktron are space pirates after all). I also added an egress hatch on top (for docking to space stations). |
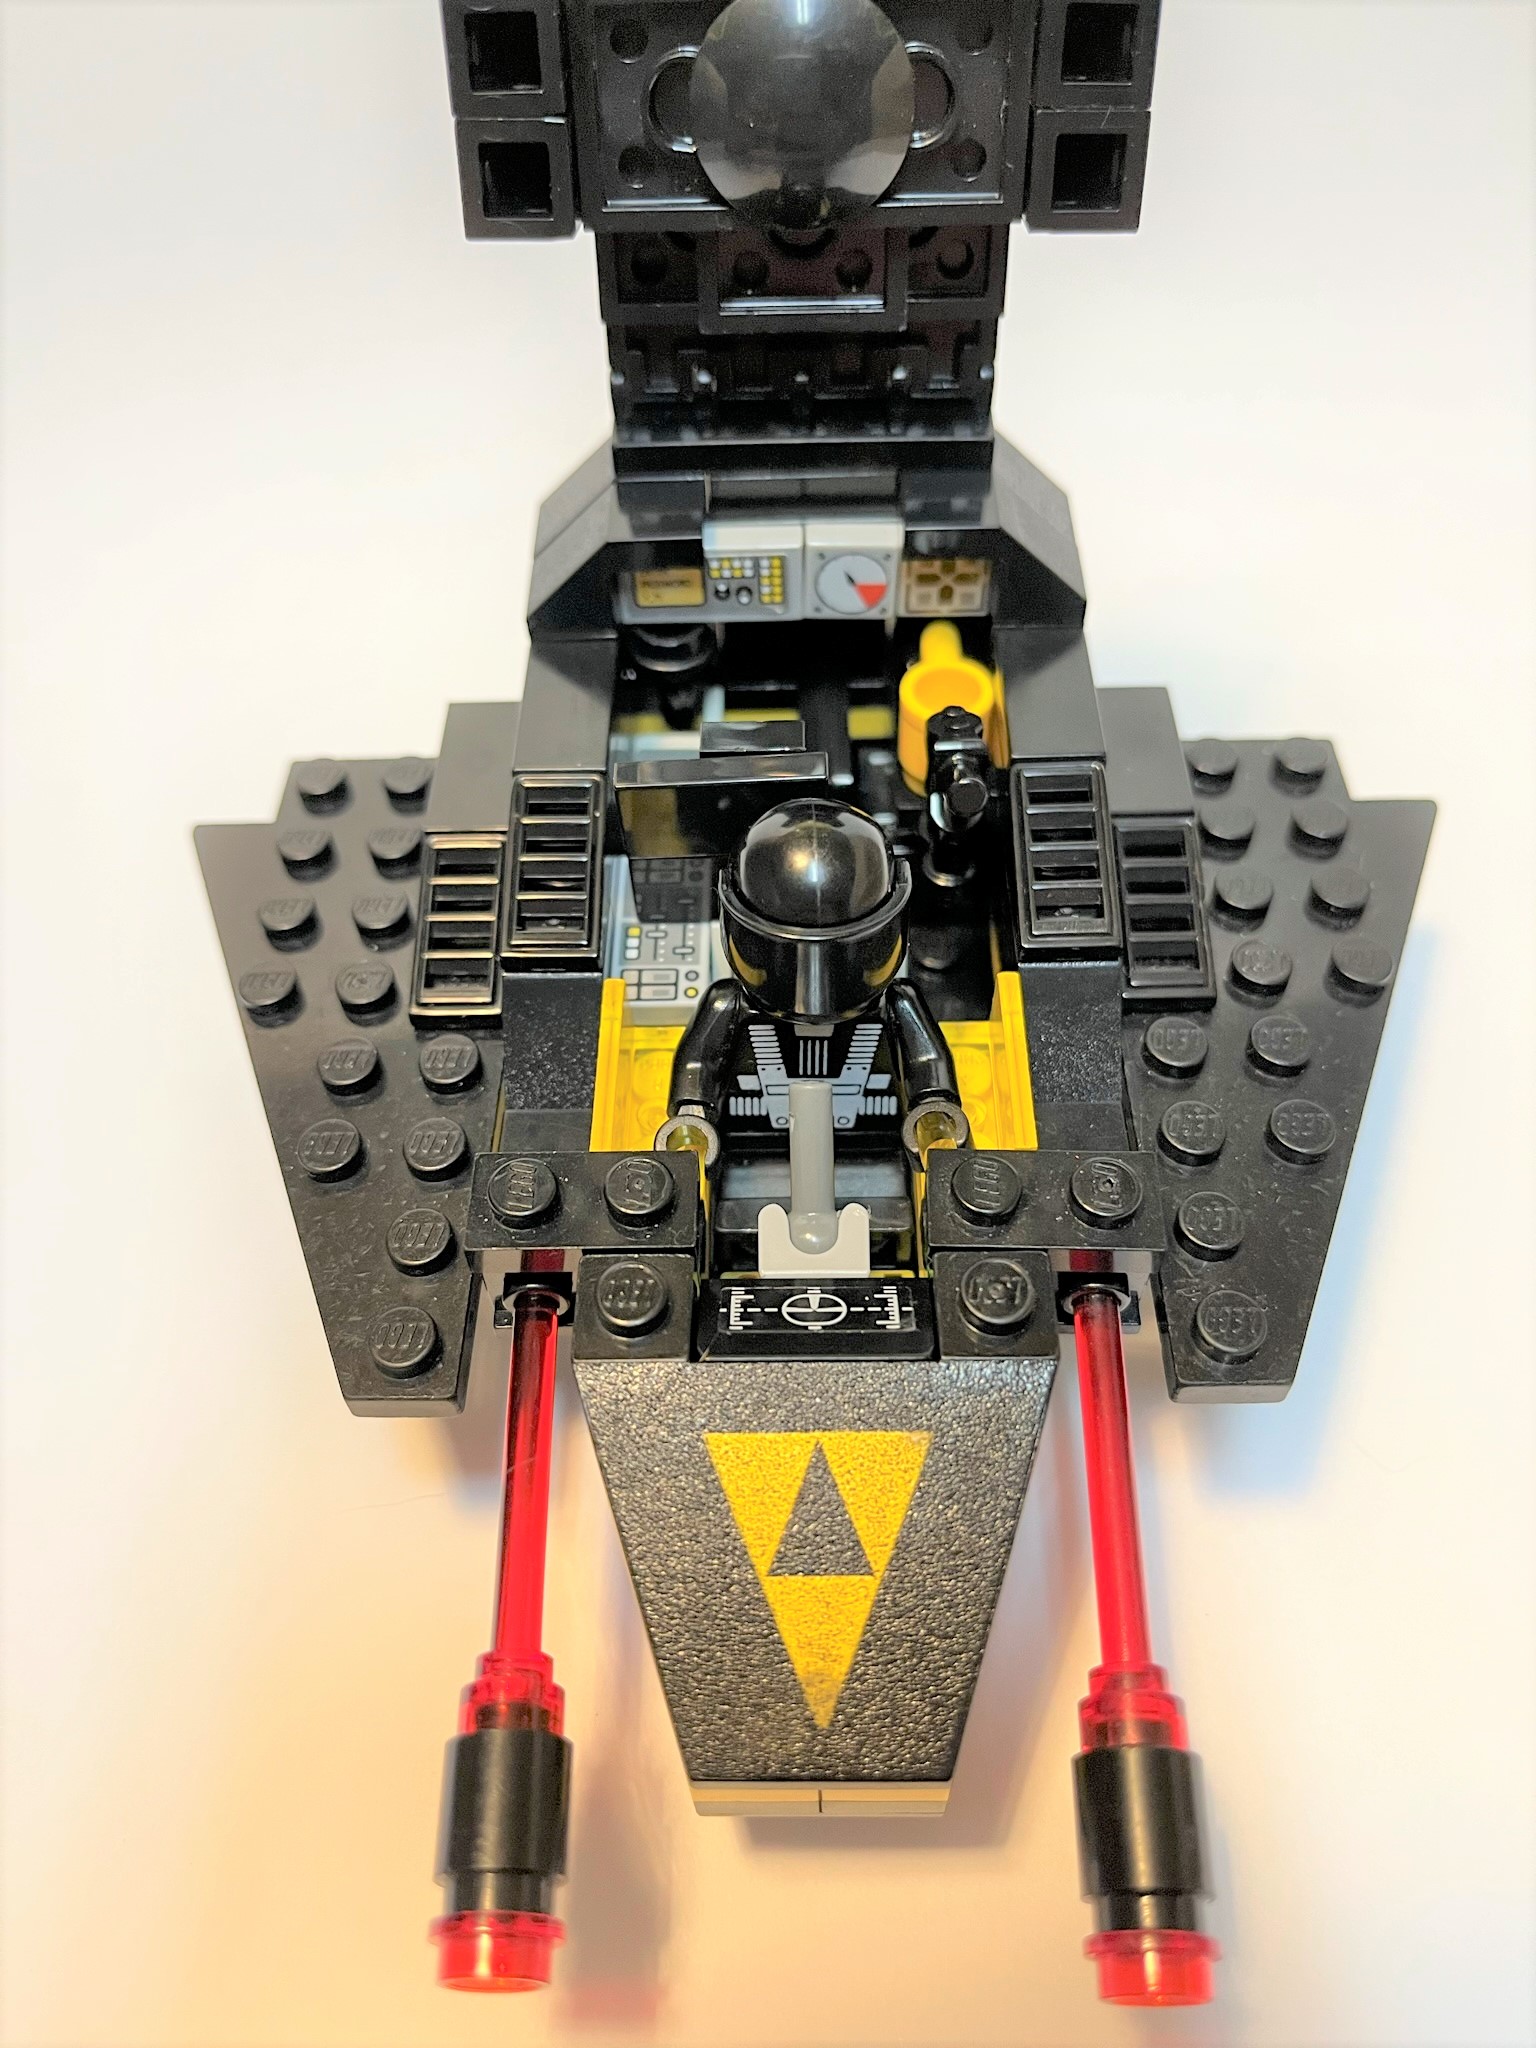 |
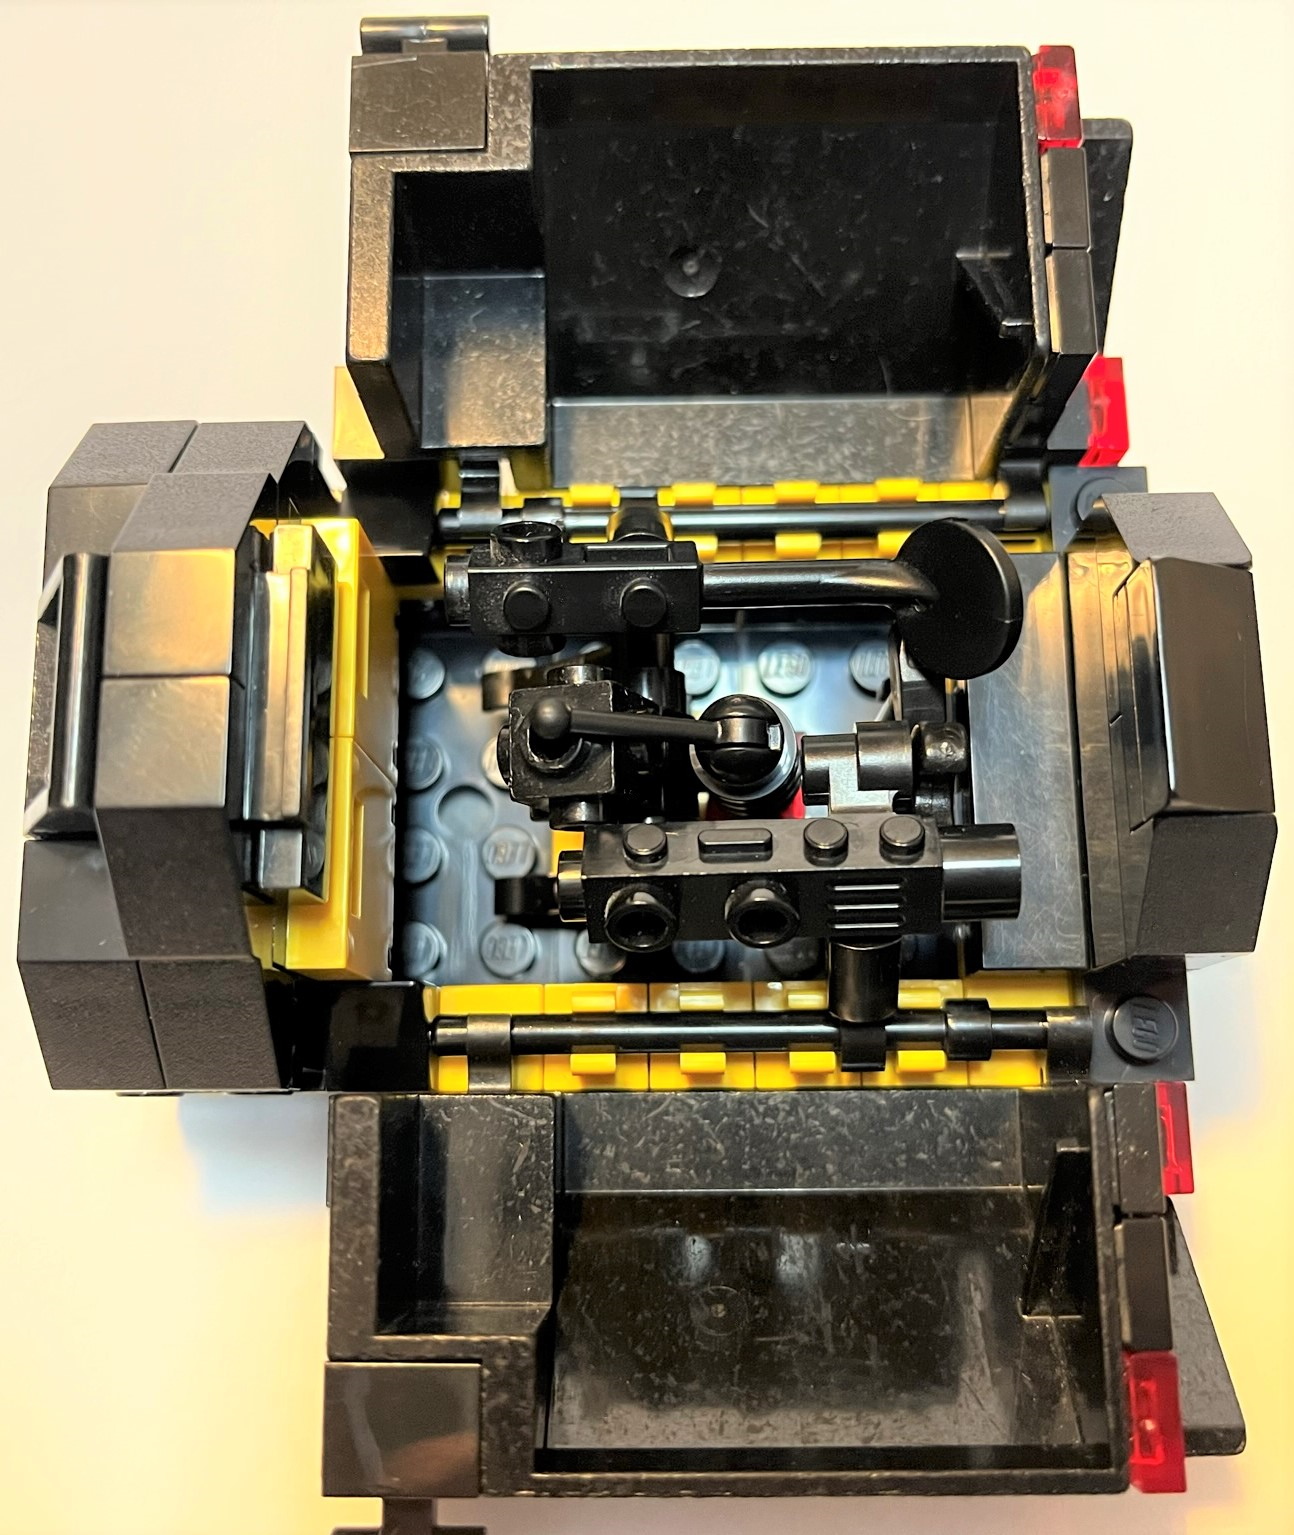
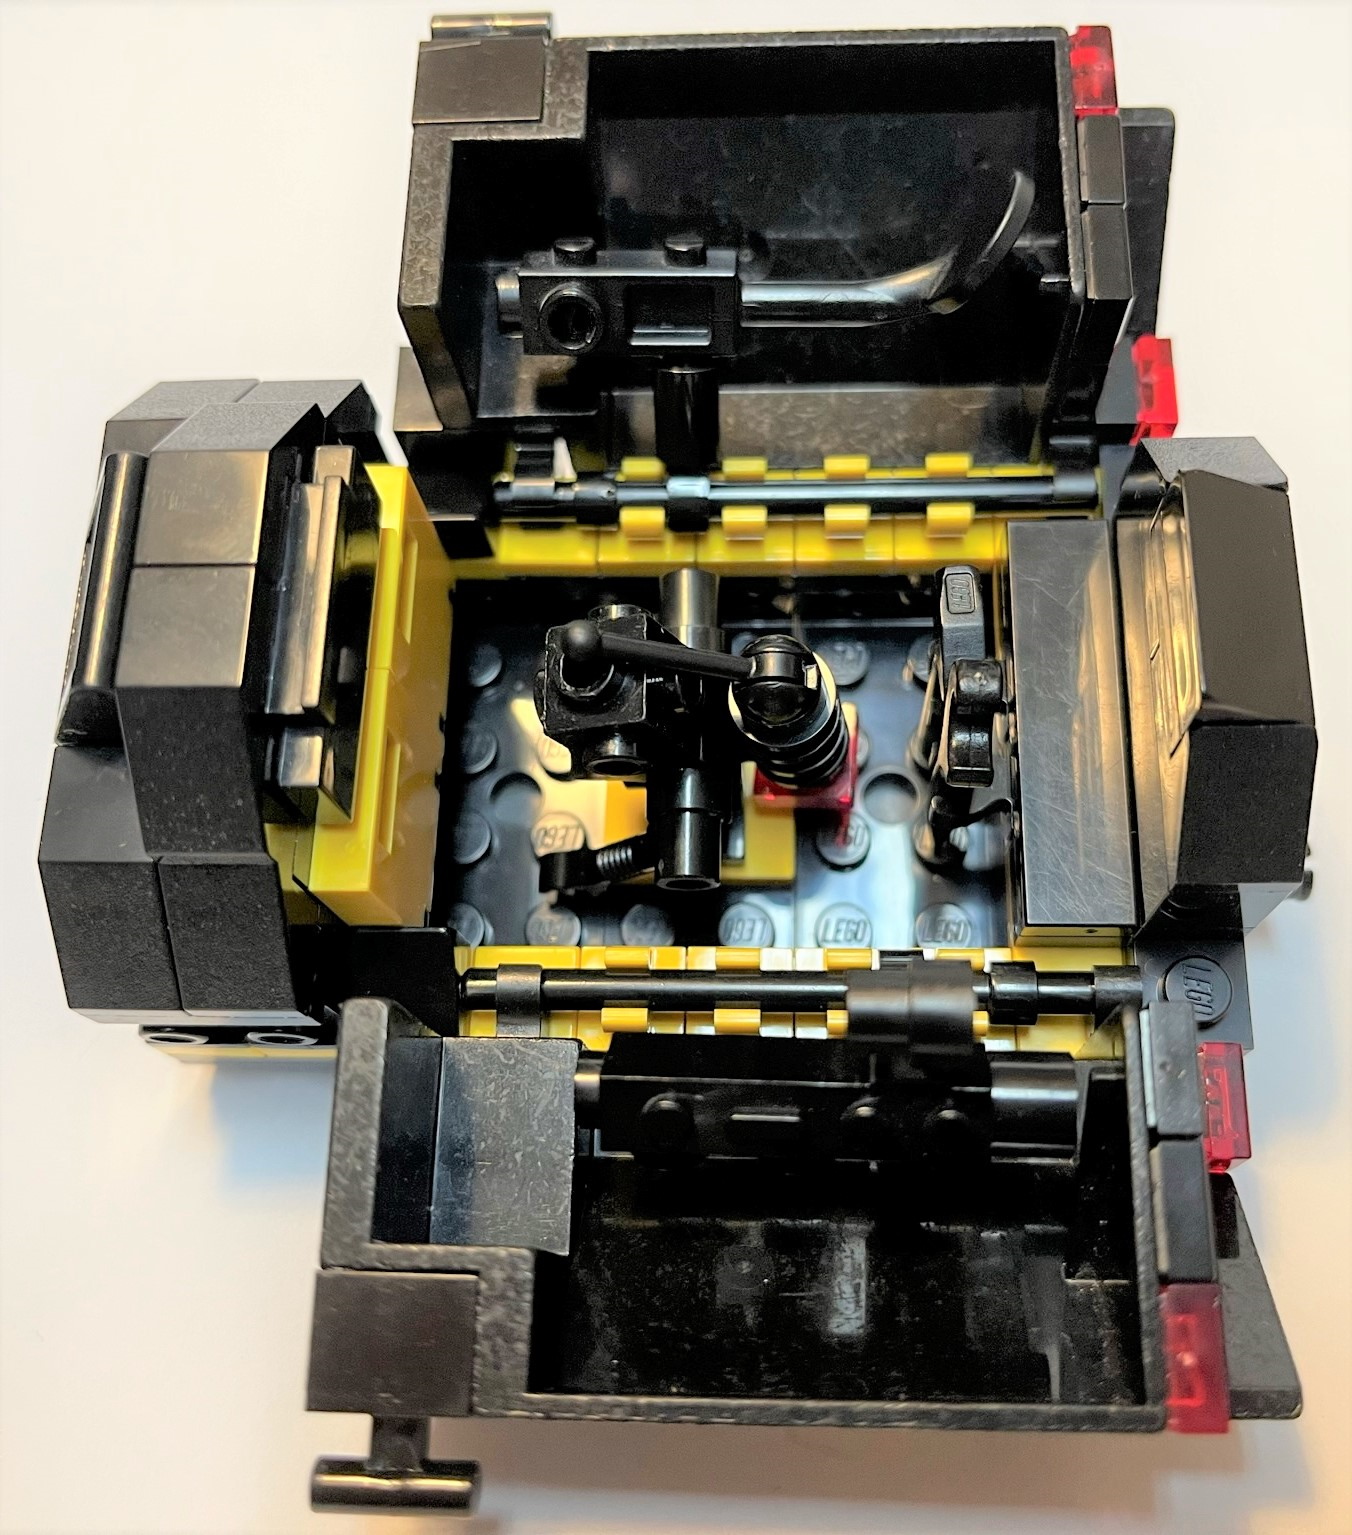
Opening the cockpit. The partition had to be 1x2 tiles because they have no center pin, thus allowing me to move them slightly out of alignment to accommodate the windscreen. You can see how the cockpit opens and also see the inside part of the egress hatch. I have been able to cram a lot of things in the aft section of the cockpit, which you will be able to see better in the next picture. Since the pilot seat on the original set was gray (and I am still using it in this build), I took the liberty of using more gray pieces for the interior so that the different components/appliances are not all black and indistinguishable from each other. NOTE: You have to assume that the ship is equipped with an artificial gravity generator inside this module. |
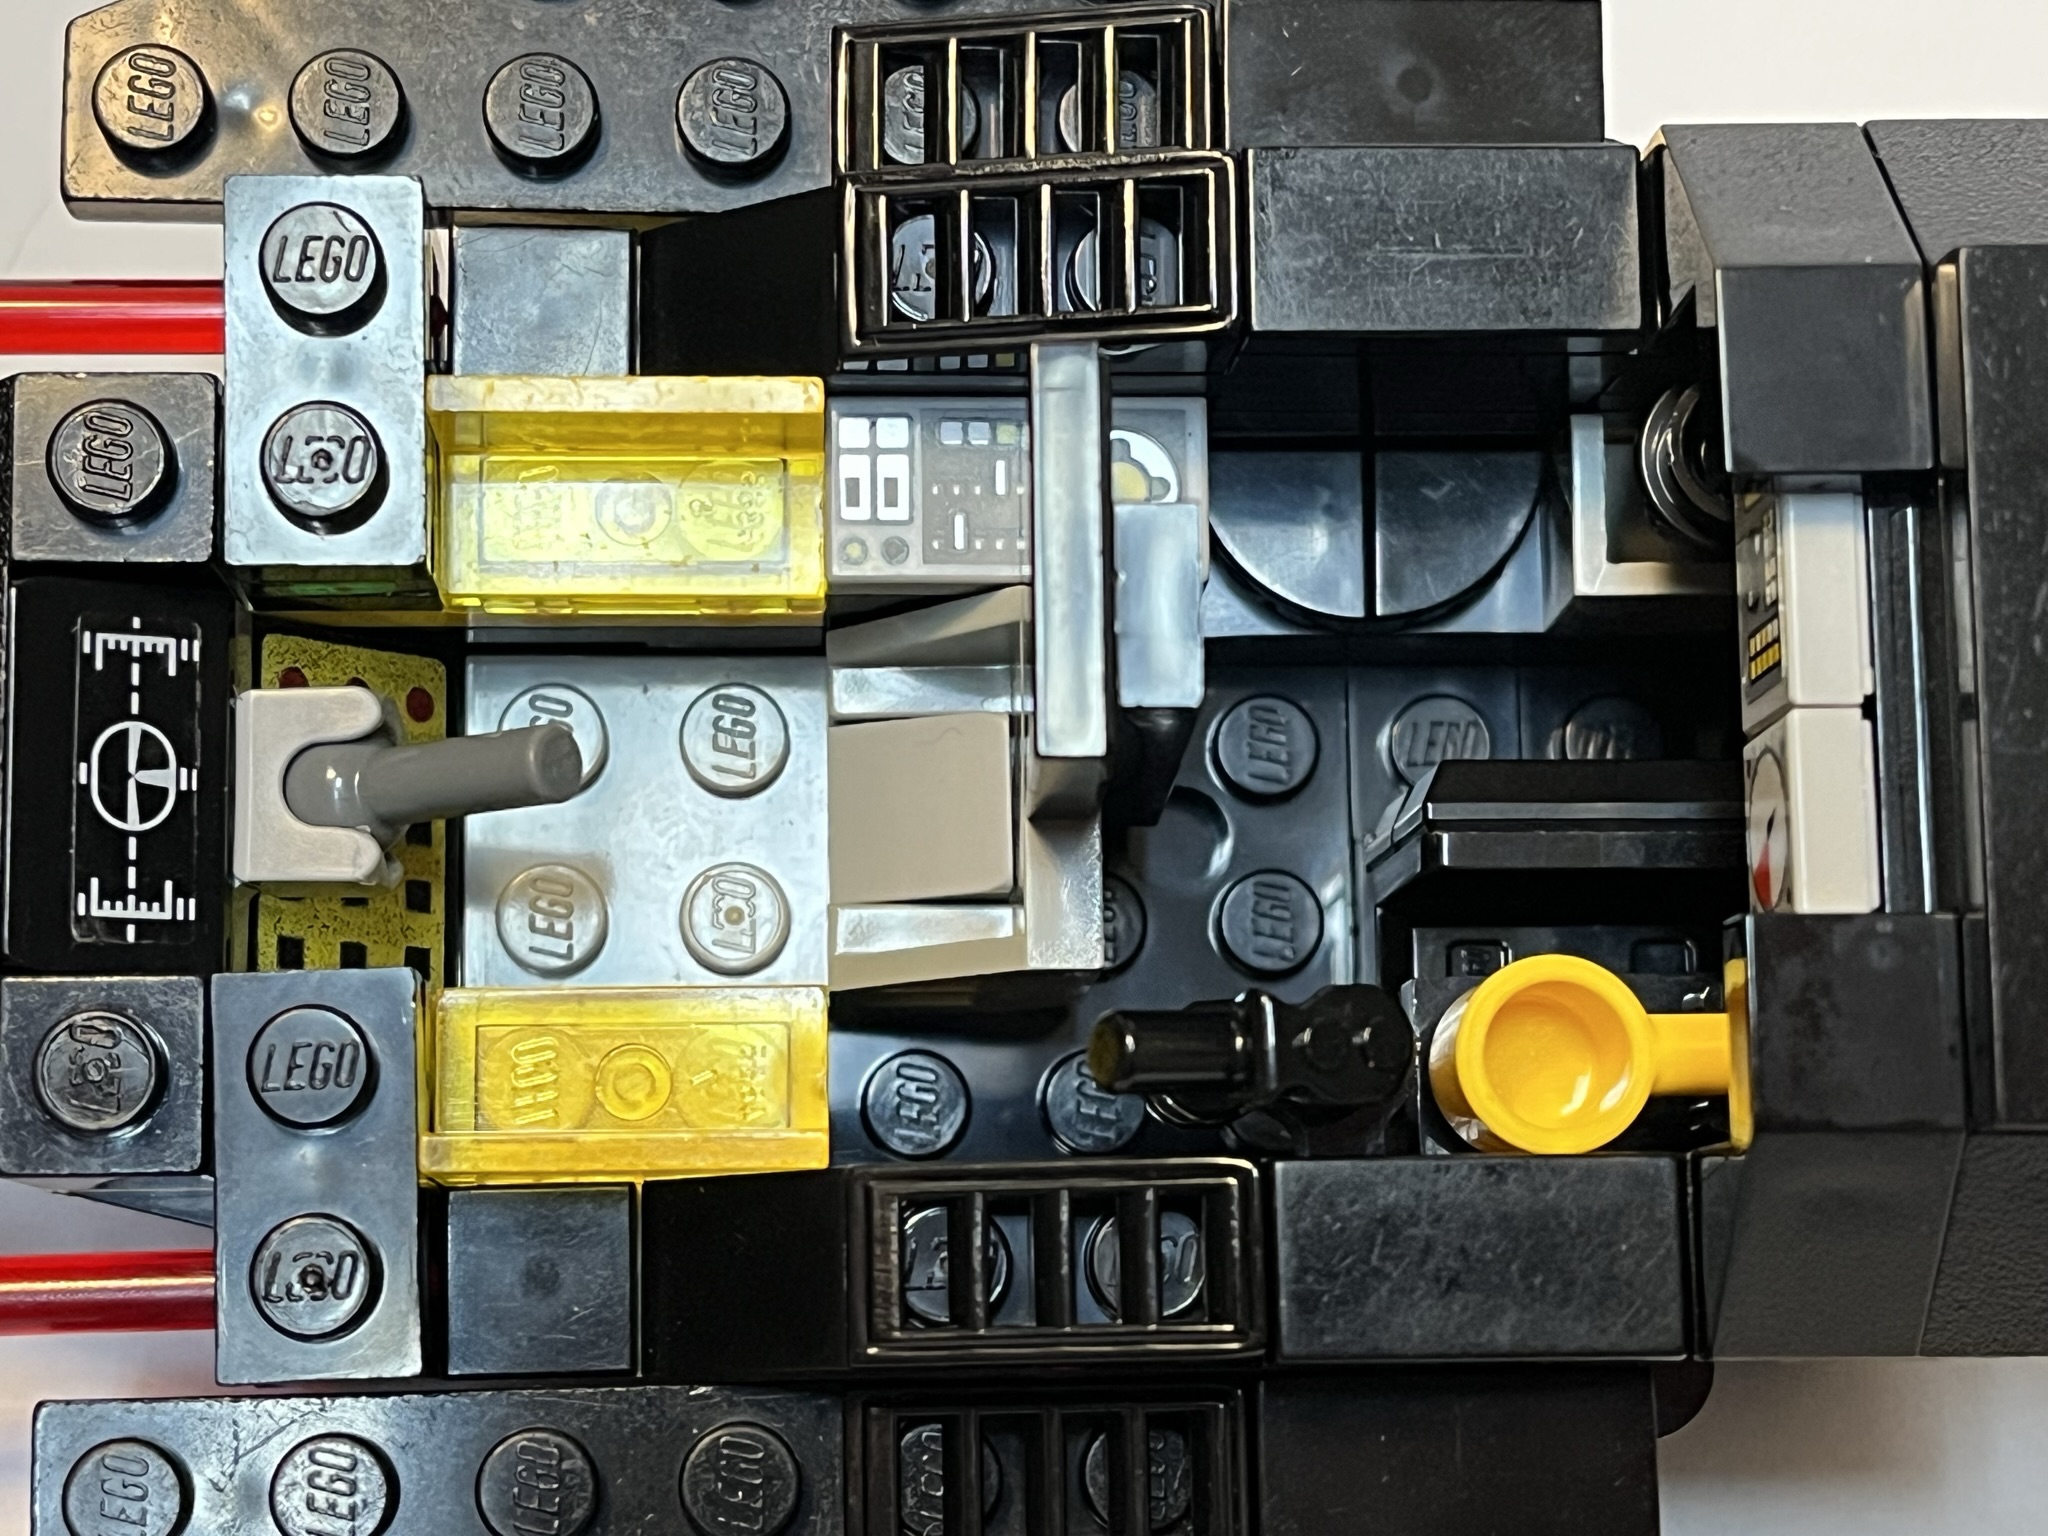 |
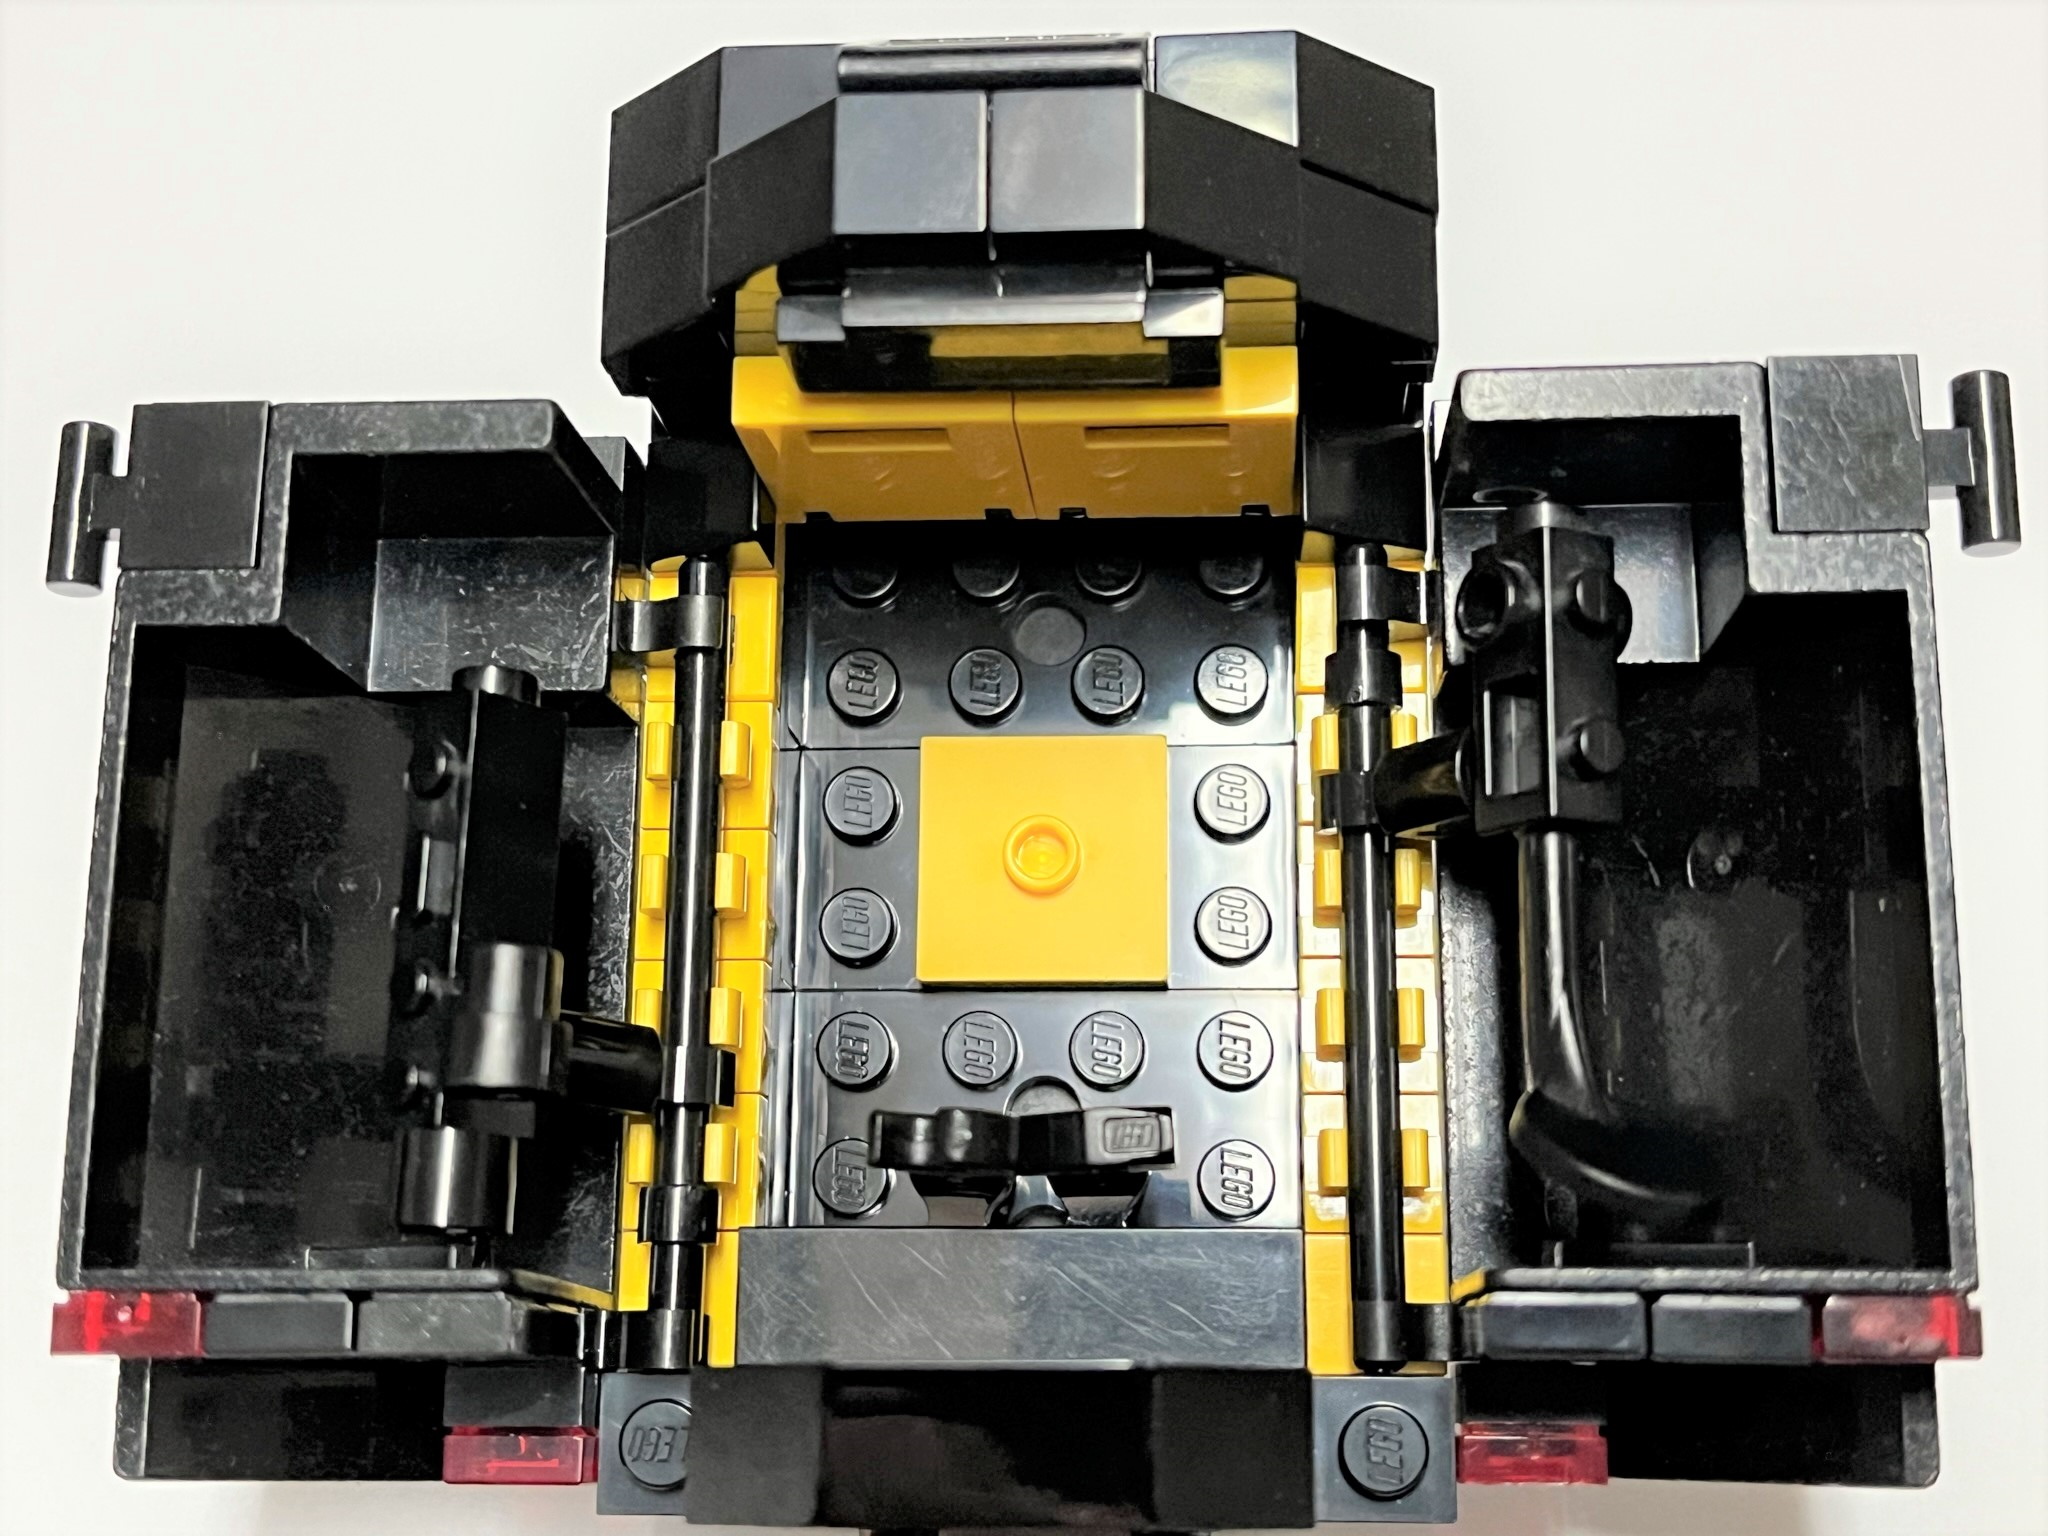
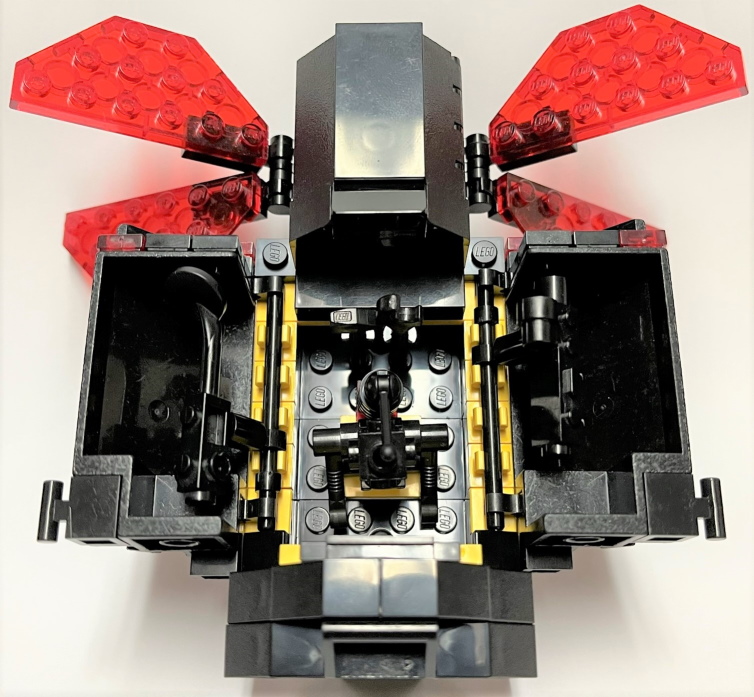
A top-down view of the inside of the cockpit. Imagine that the seat and partition can convert into a bed. I have created a build that actually did that as a play feature, but the aft section is too cramped to play with it without using long tweezers (thus defeating the play feature), so I reverted to the original pilot seat and imagi-naaaation! (imagine the Spongebob IMAGINATION! rainbow GIF here). Assuming artificial gravity, you can also see a toilet (I did not have part 1748 on hand), table (with mandatory LEGO coffee cup!), chair, and sink with faucet. You cannot see the food synthesizer/replicator from this angle, hence the next picture. NOTE: I feel a little bad about the illegal placement of the ball joint holder over a 2x2 slope piece, but this is what the younger version of me would've done (and considered worth the potential stress on the affected bricks; and it's not load-bearing). |
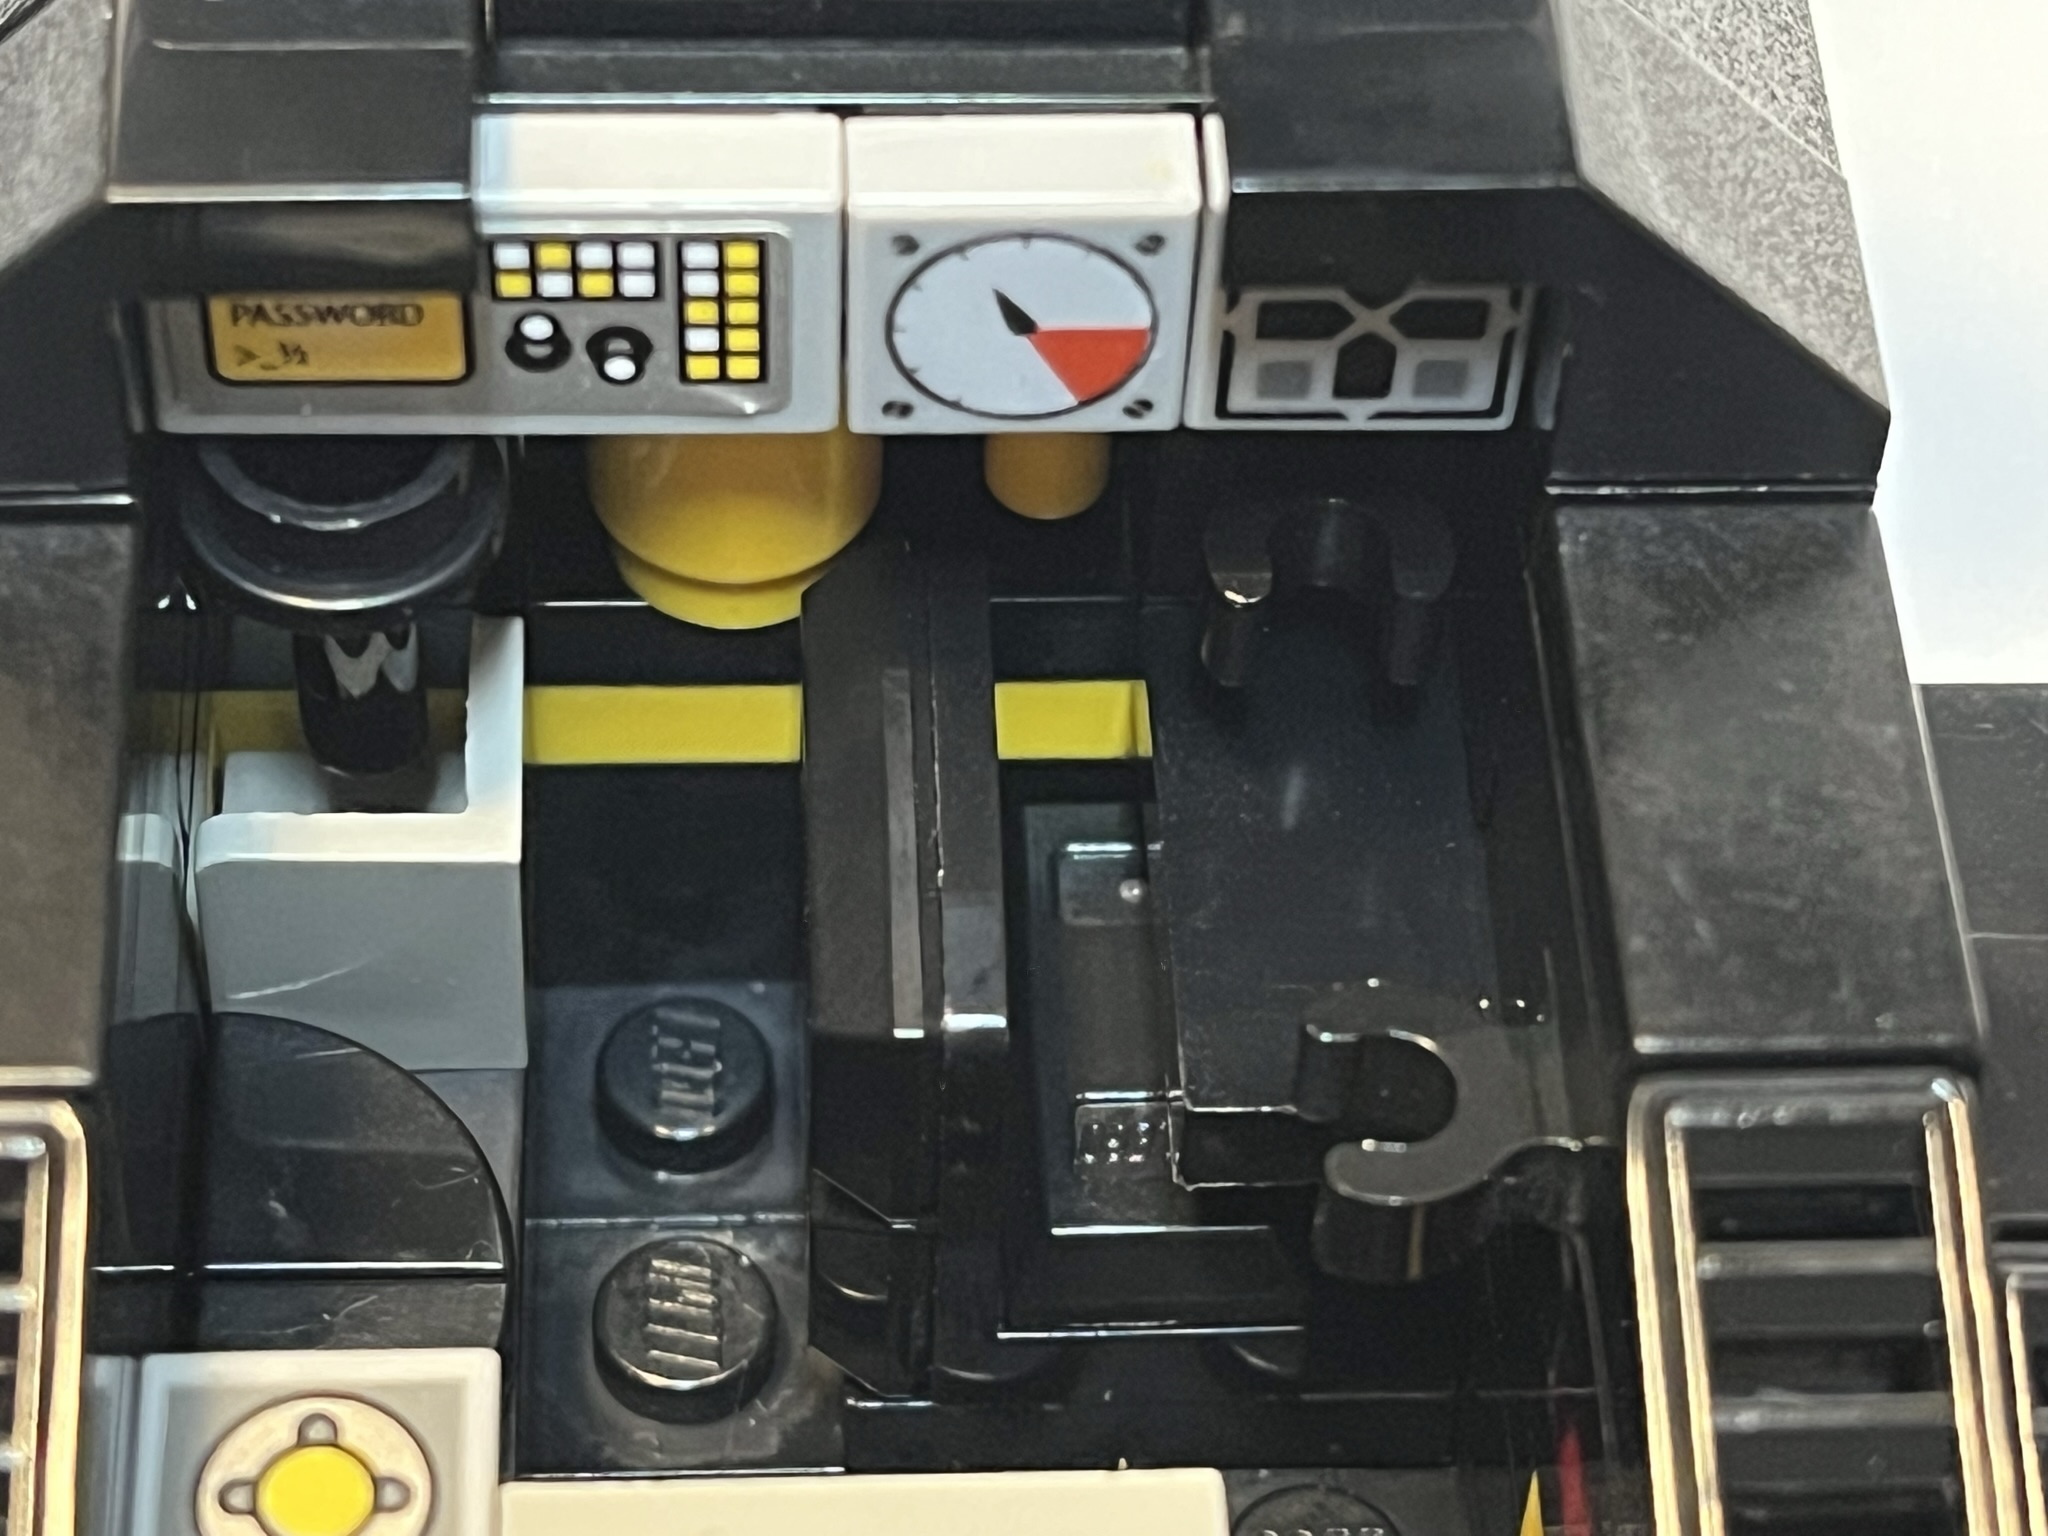 |
A closer look at the back. I put the coffee cup inside the food synthesizer/replicator so that you can see which is the food replicator (where the cofee cup is) and the gray sink to the left of it. You also have a better view of the table and chair, and can still see the toilet and its gray control console with yellow flush/clean button. Imagine a futuristic, cleaner toilet with some new bidet tech or something that does not require toilet paper anymore. Also imagine that the pilot can choose to sleep with the windscreen transparent (sleep under the stars) or that there is technology in the windscreen that will render the windscreen opaque (reminding me of the technology used in auto-darkening welding helmets offering multiple levels of darkness/opacity). |
Cargo module
(Click on each picture for a full-size version)
 |
 |
| Everything fits snugly inside the cargo bay. | Moving the metal detector (I only have the modern, non-studded version on hand) and the space |
 |
 |
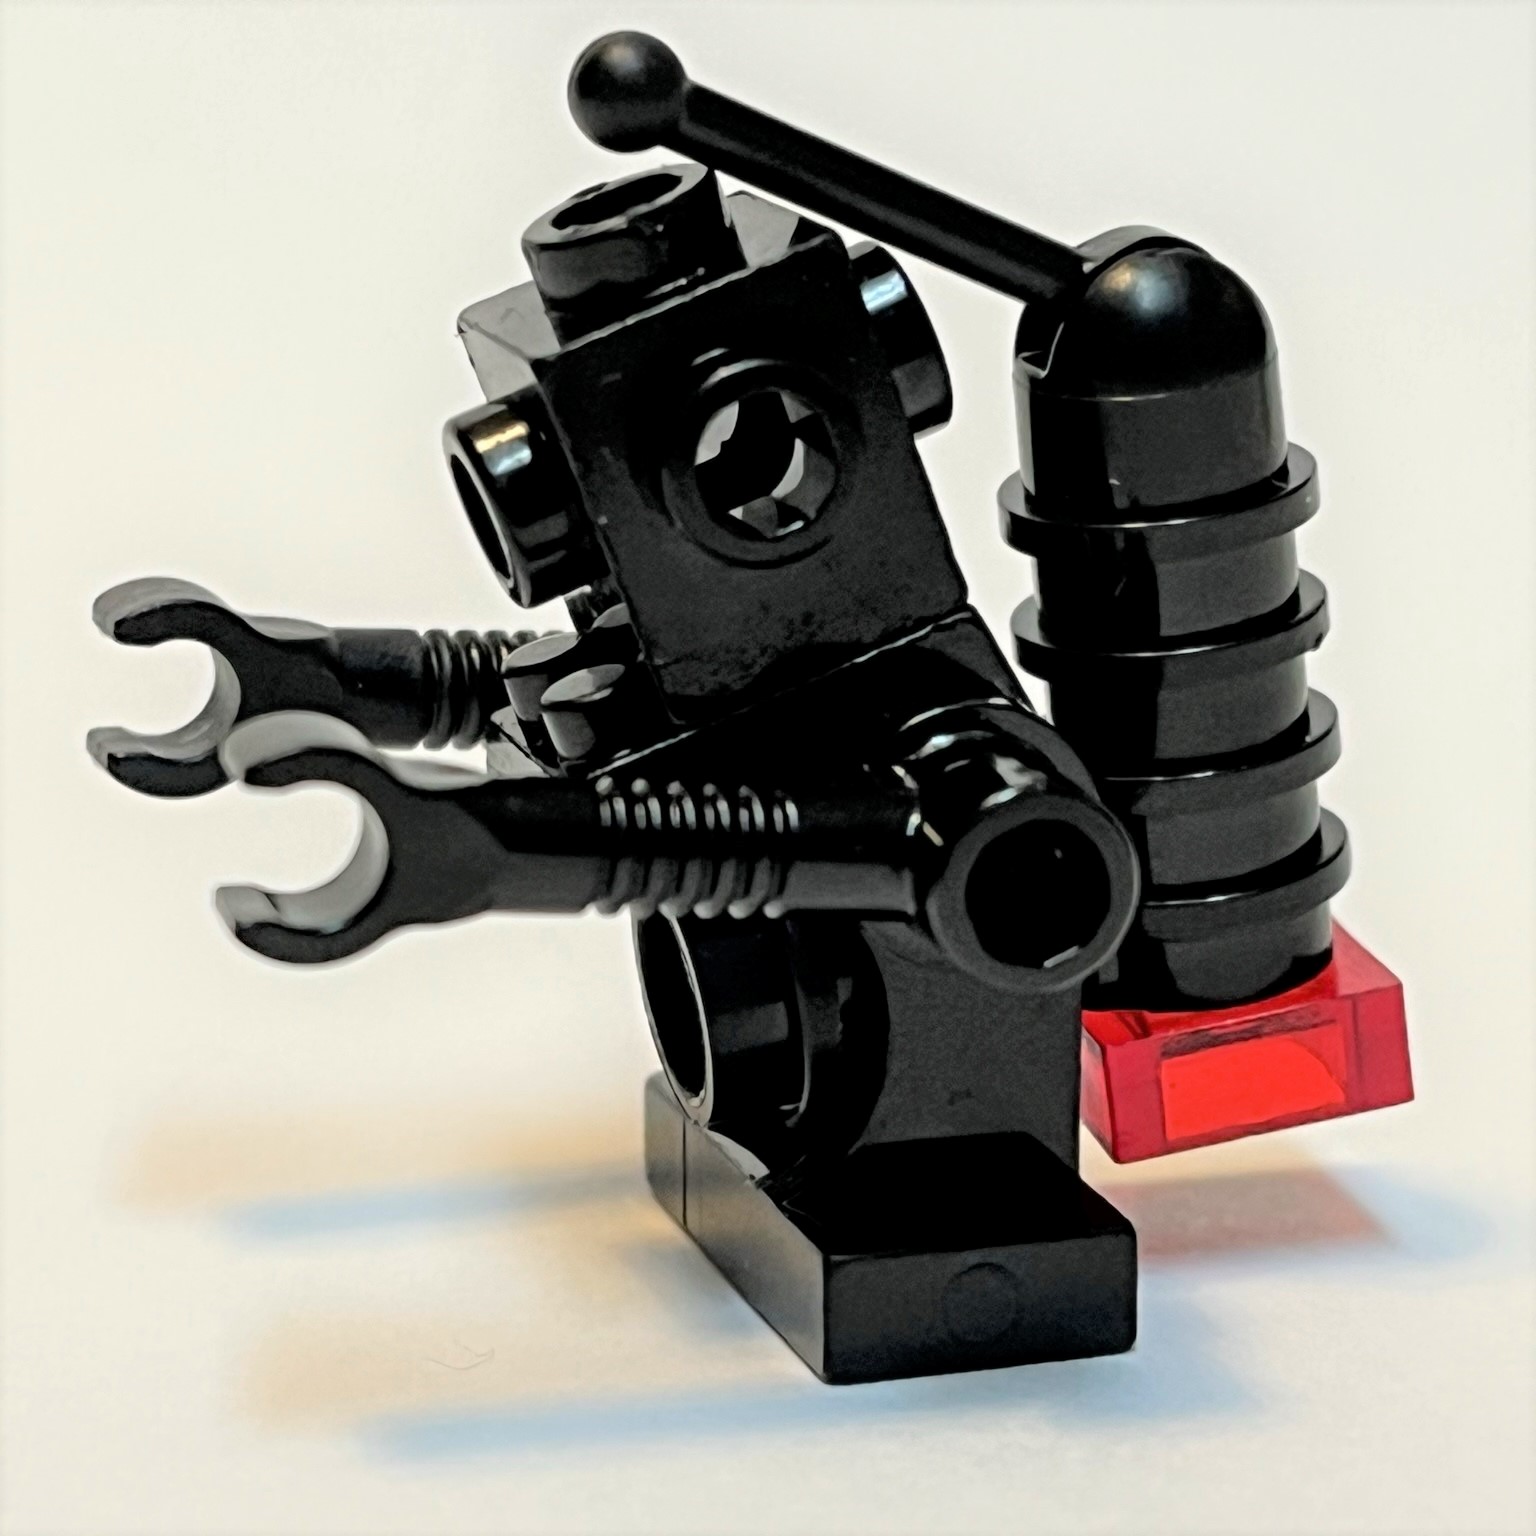
| The original robot got a jetpack upgrade. | Here is the robot with some tools. |
 |
 |
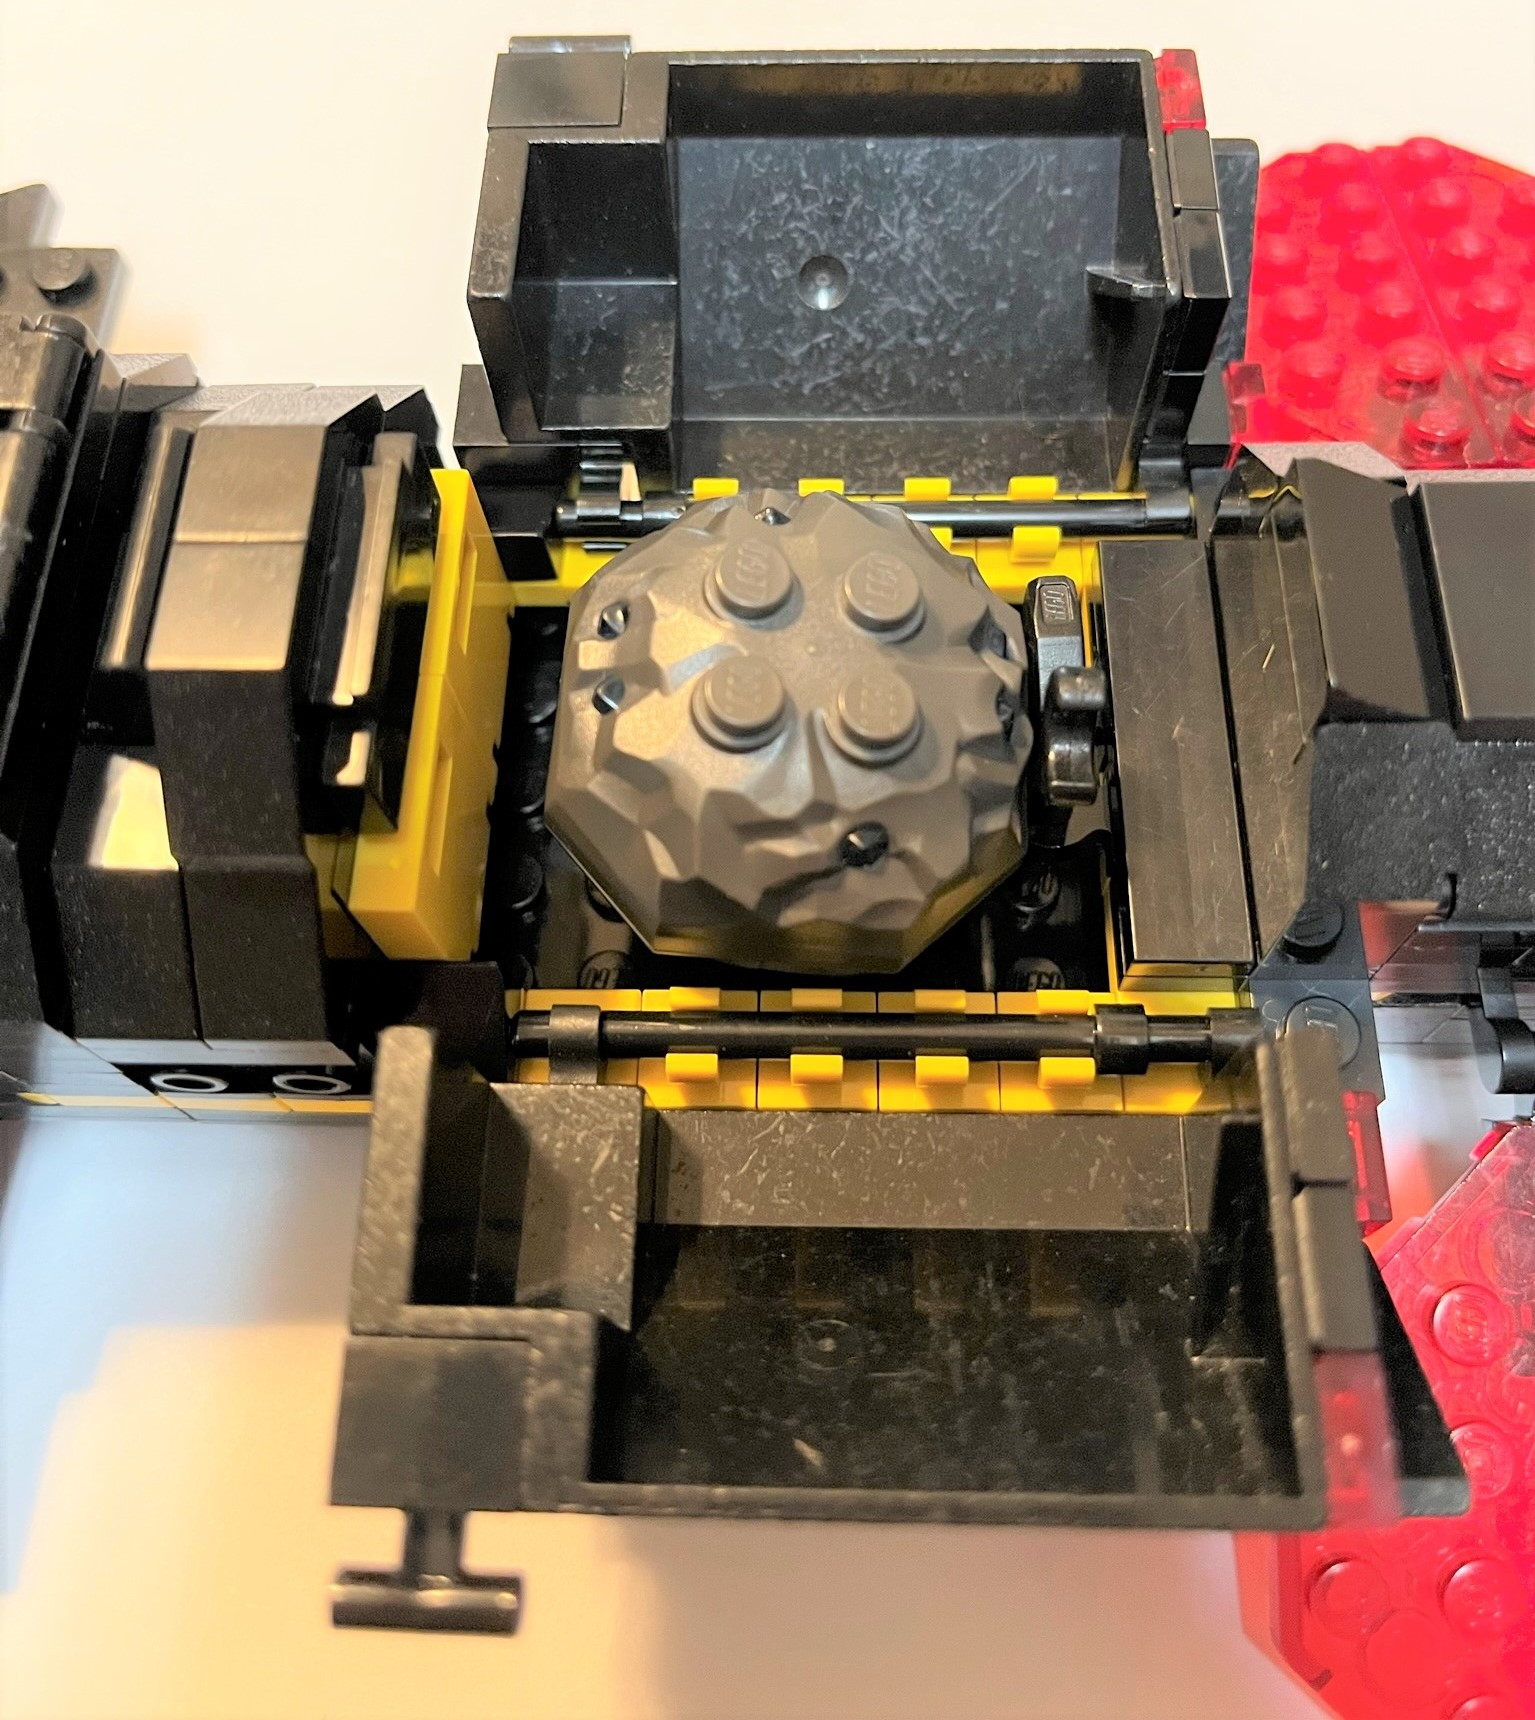 |
| Spacious cargo module when you remove the robot. | Additional storage cabinets for space pirate treasure. | A LEGO octagonal boulder fits nicely inside the cargo bay with the doors closed (excluding the robot, detector and camera). |
Communications Array (or solar panel) module
(Click on each picture for a full-size version)
 |
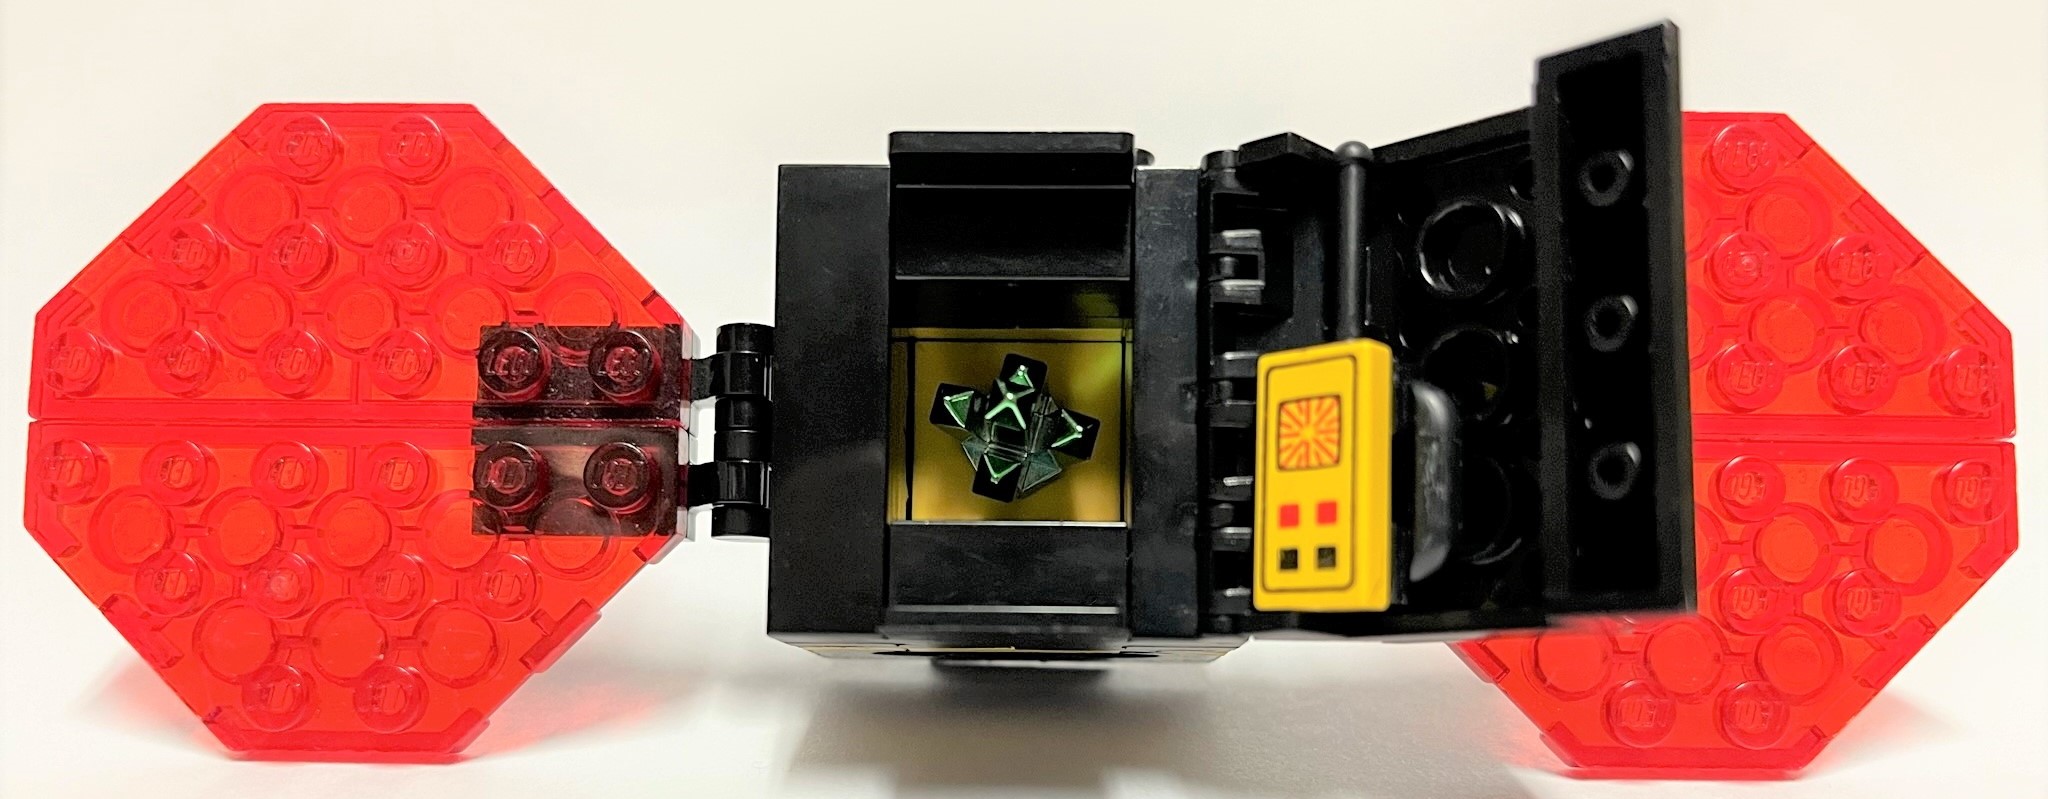
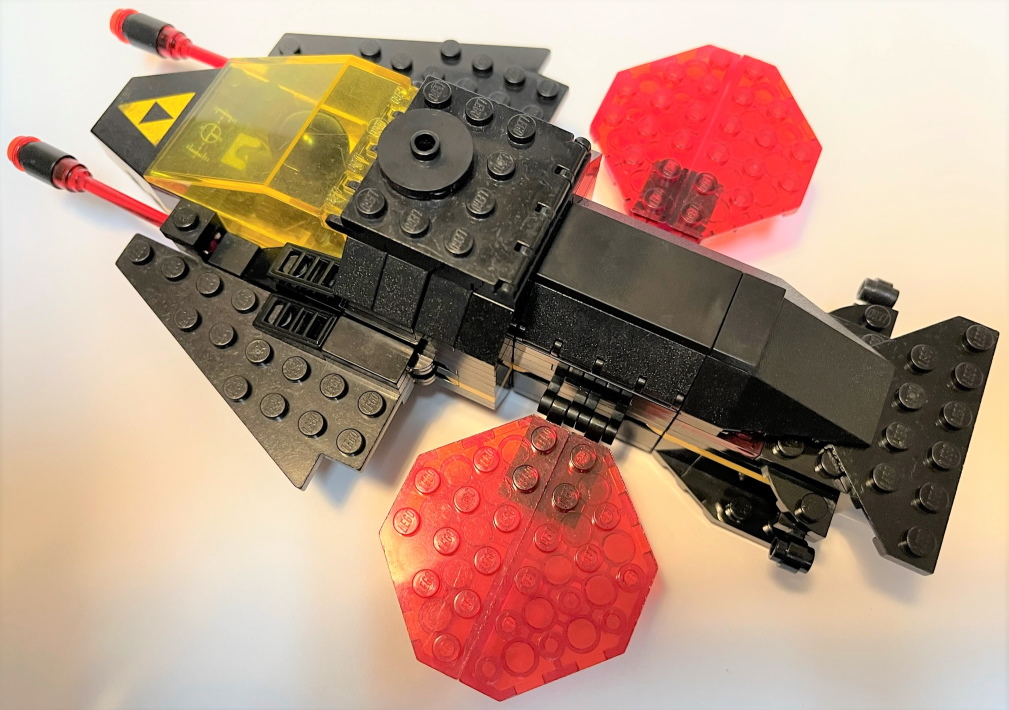
I used 26047 and 25269 to give one additional axis to move the trans-red panels. So now they can form an X (where X secretly marks the spot) in two different ways. NOTE: I would've attempted using part 14418 for more movement, but the part is not available in black as of February 2023. |
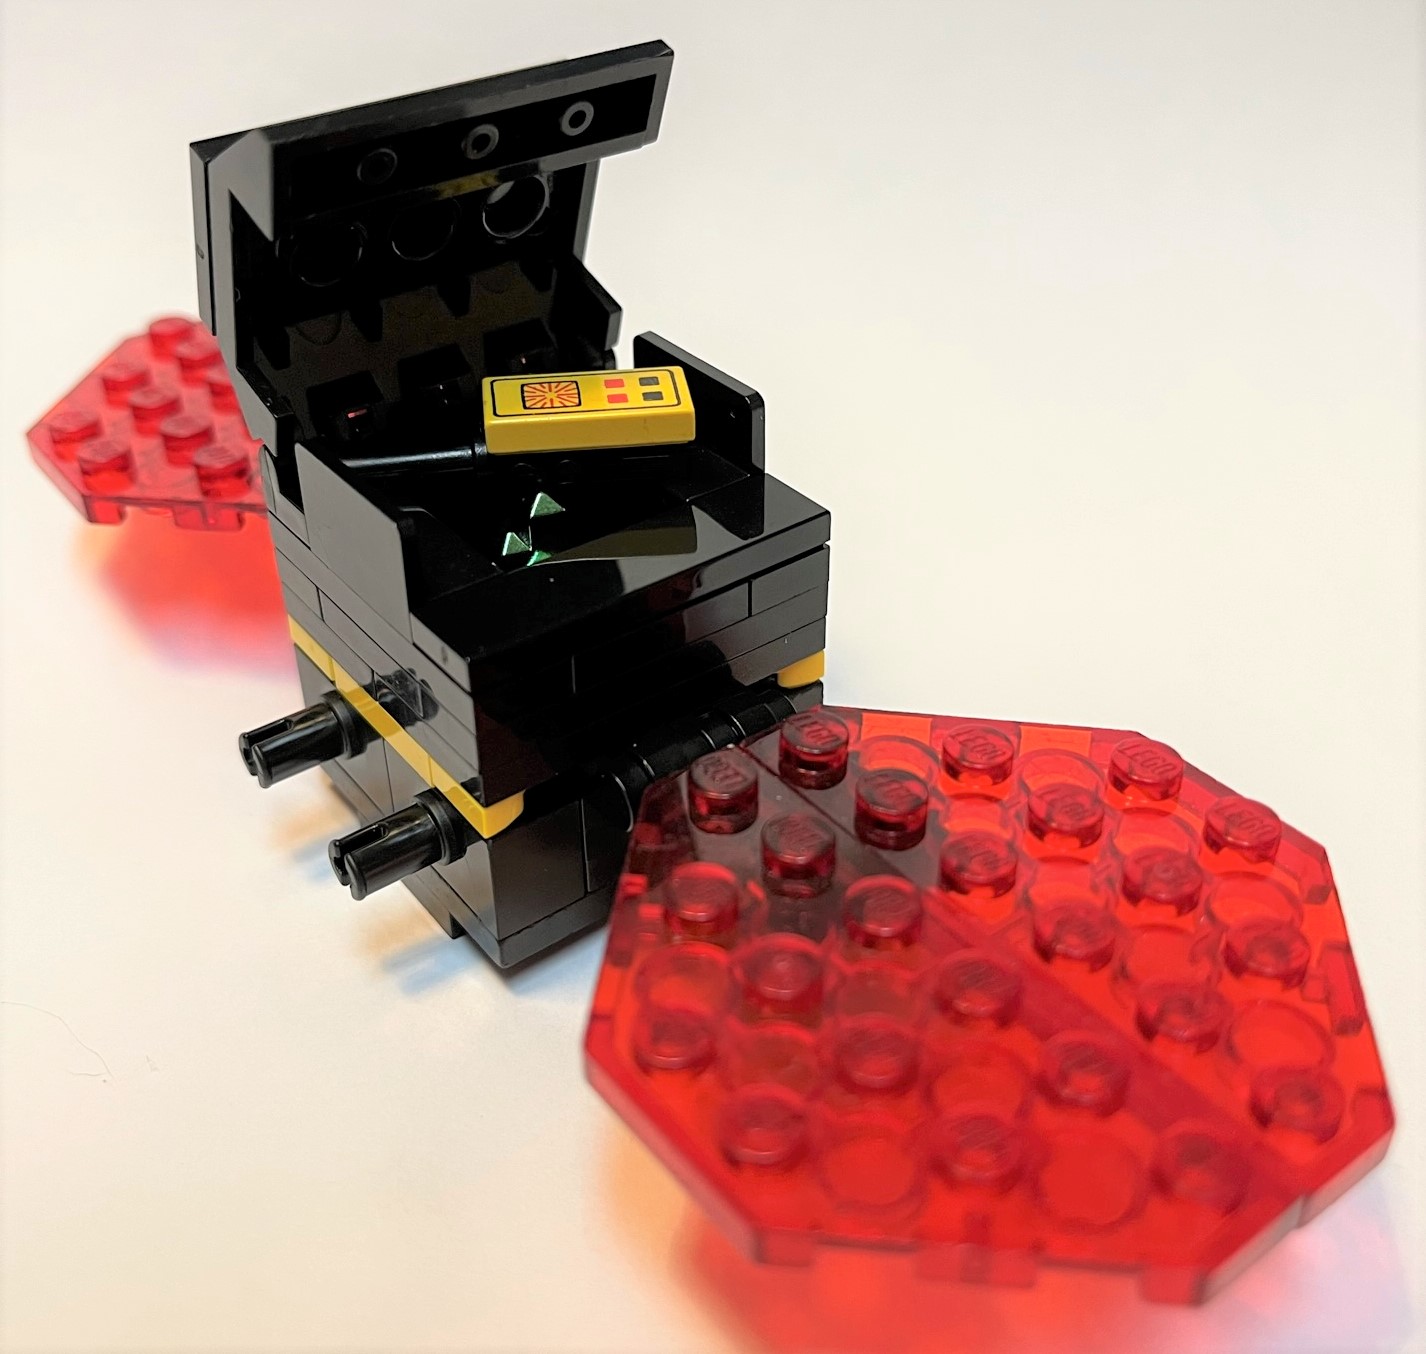 |
The module opens up to reveal hidden treasure. |
 |
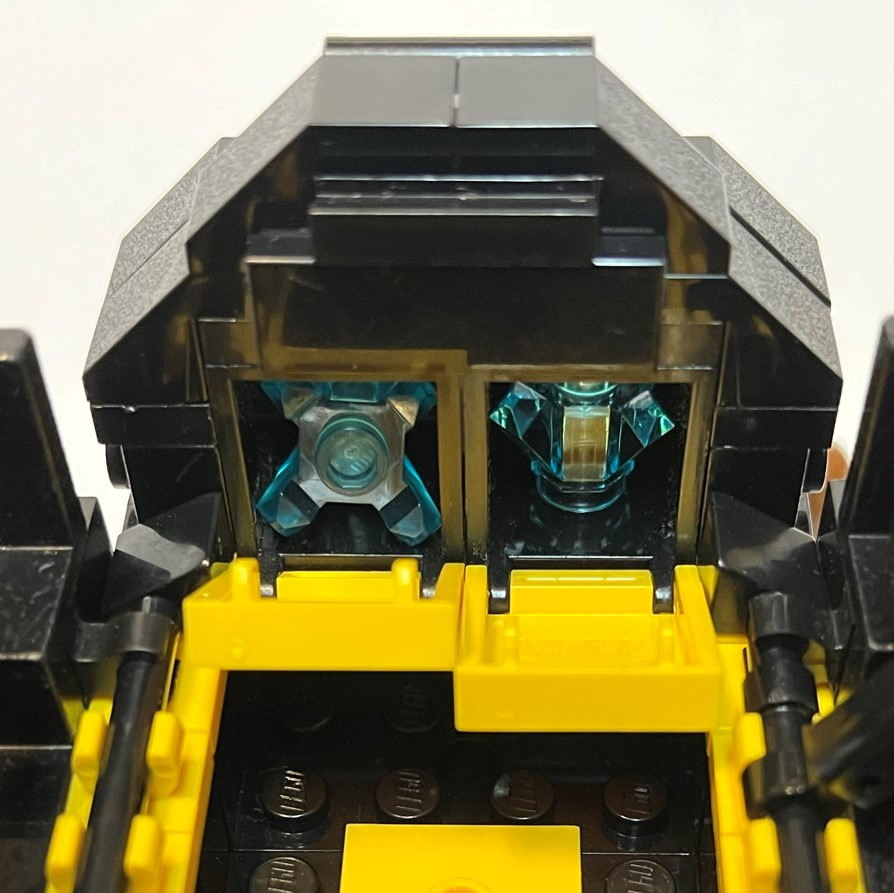
A nice chunk of stolen Unobtainium and an untraceable long-range communicator. Nice! |
Thrust module
(Click on each picture for a full-size version)
 |
 |
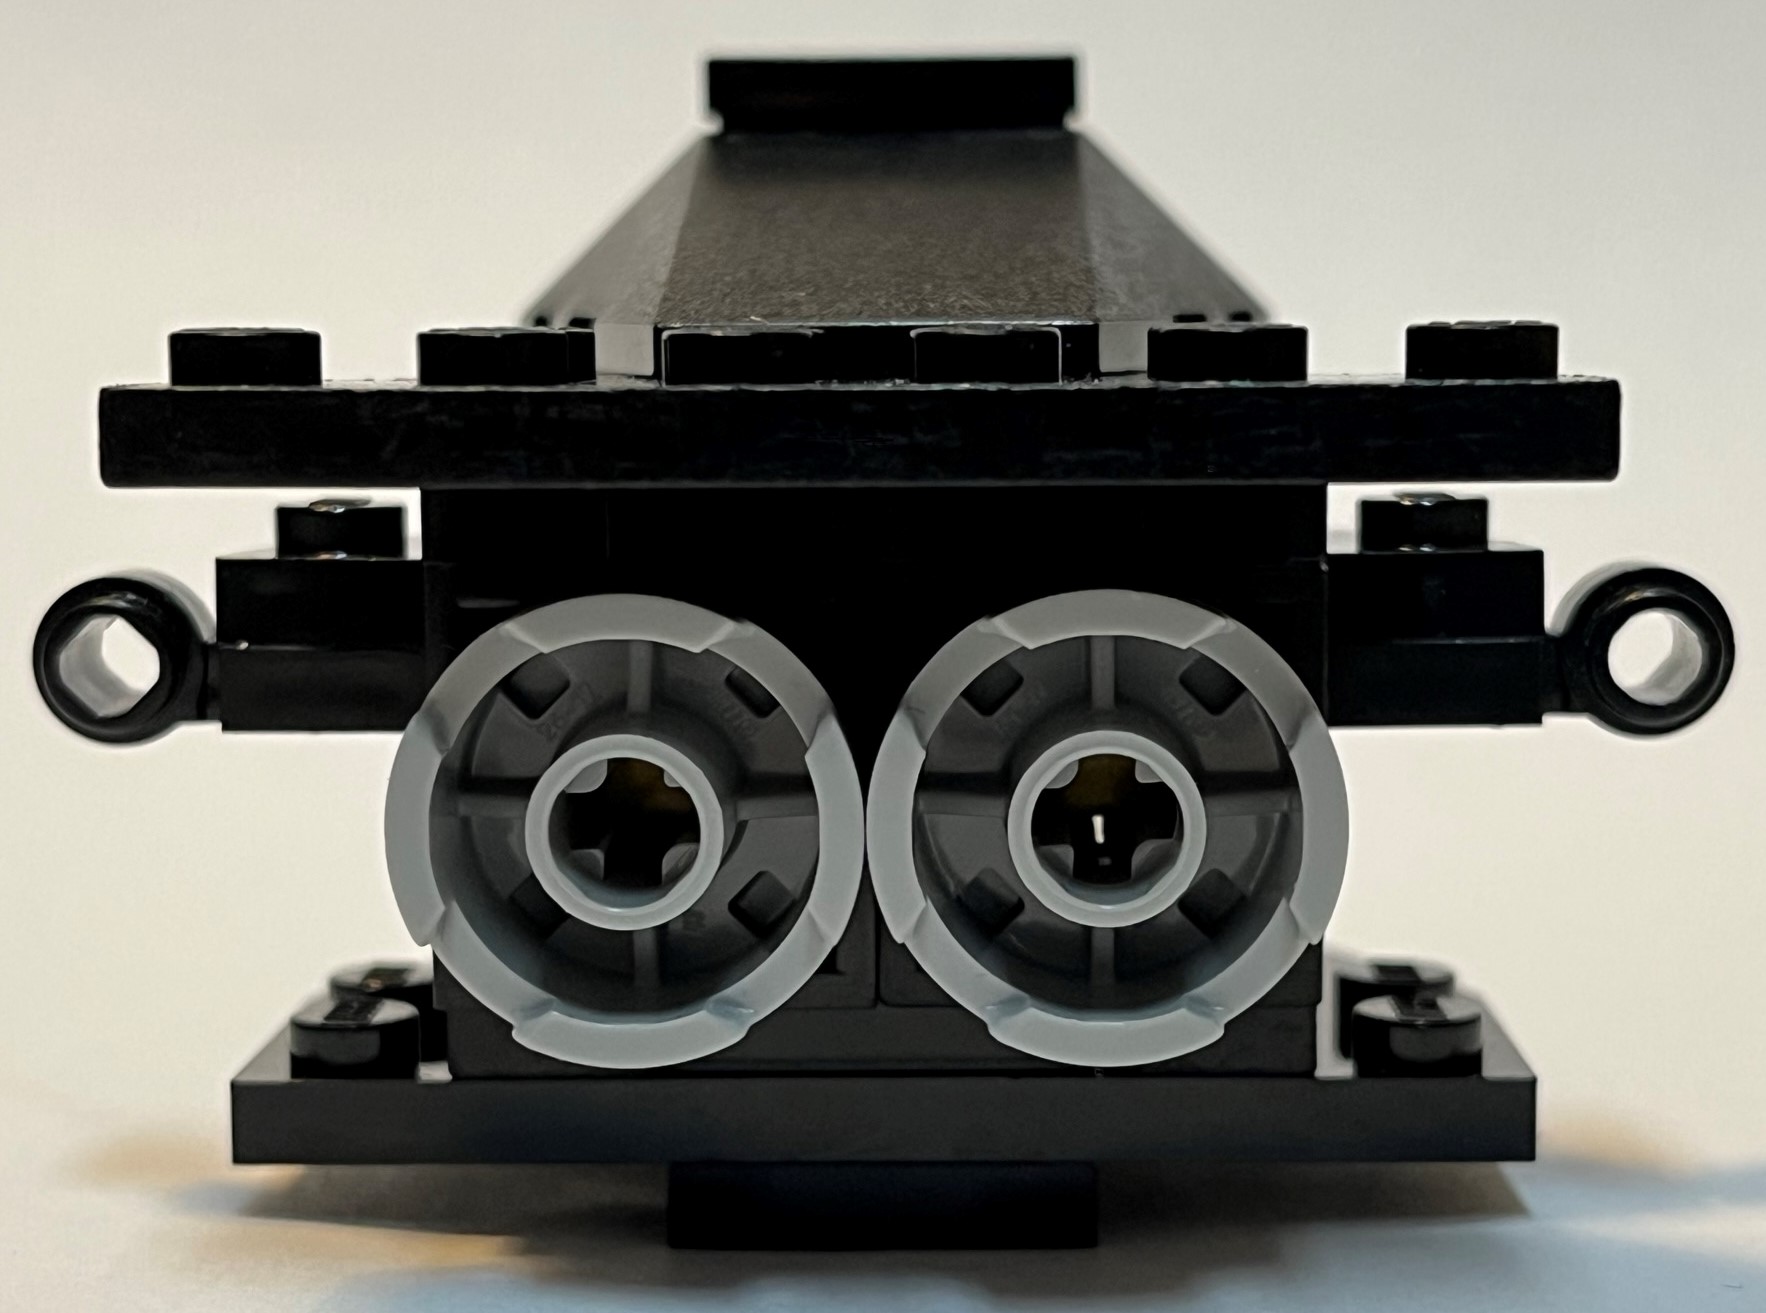 |
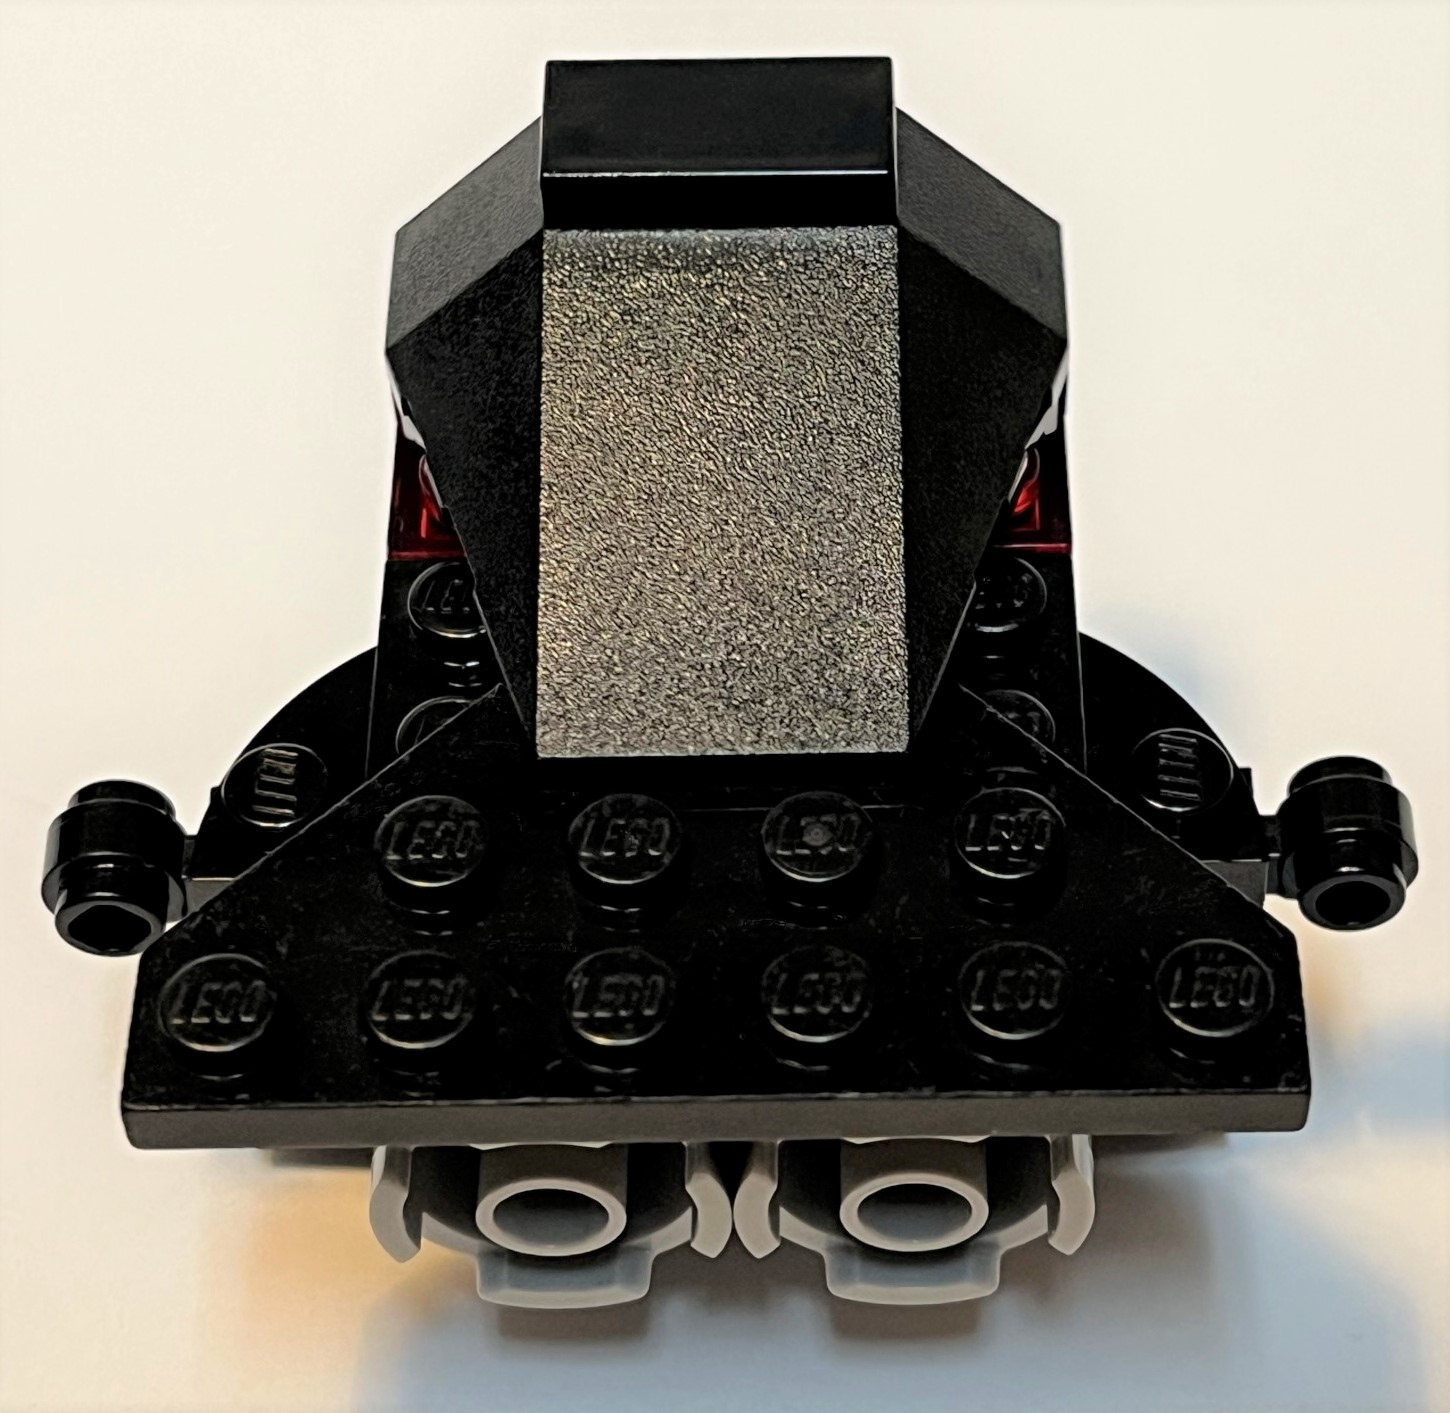
Put two thrusters instead of one, and matched the height of the Array/Communications module, while matching the style of the combined thrust/panel module of the original 6894 Invader.
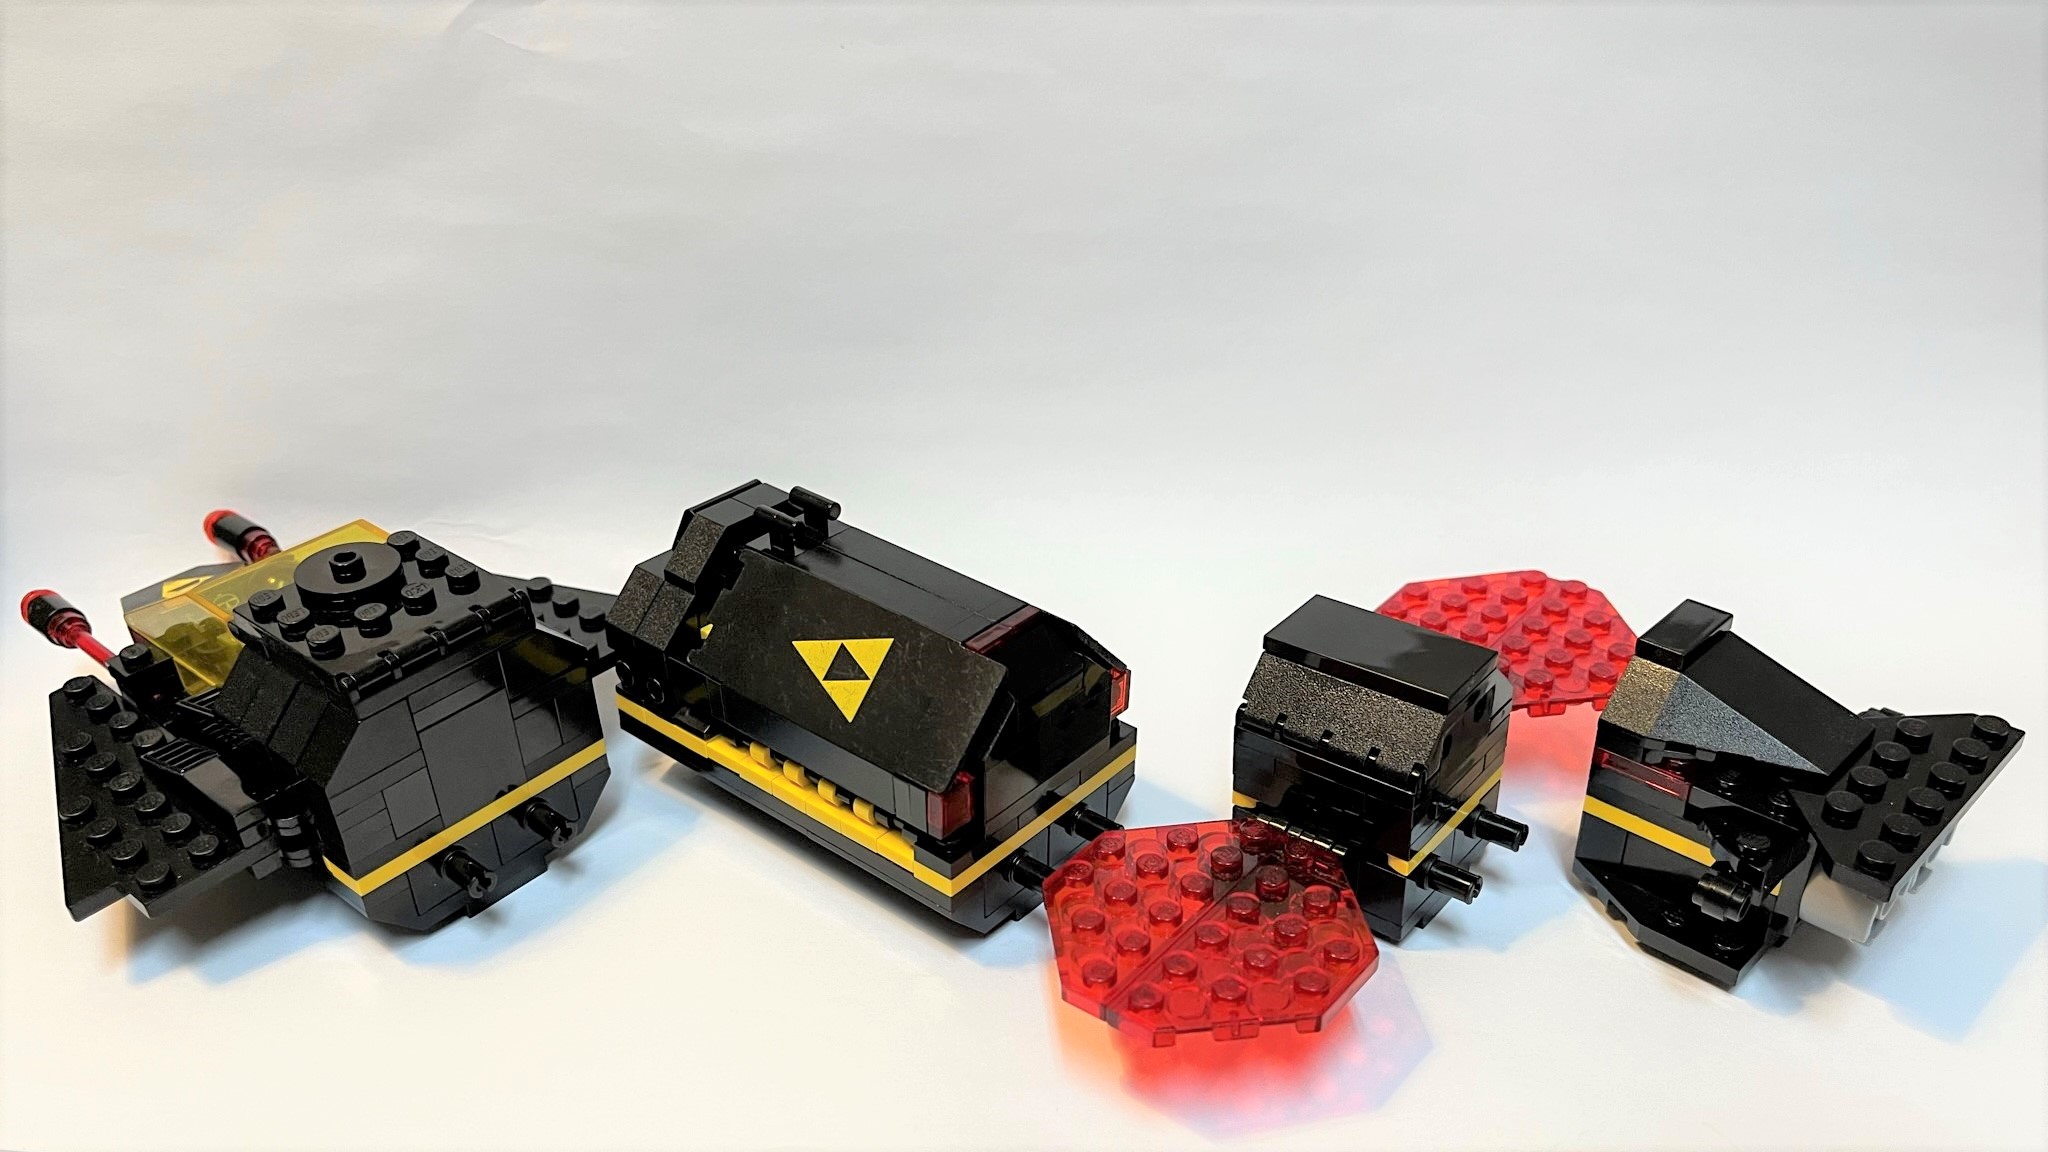
Combinations
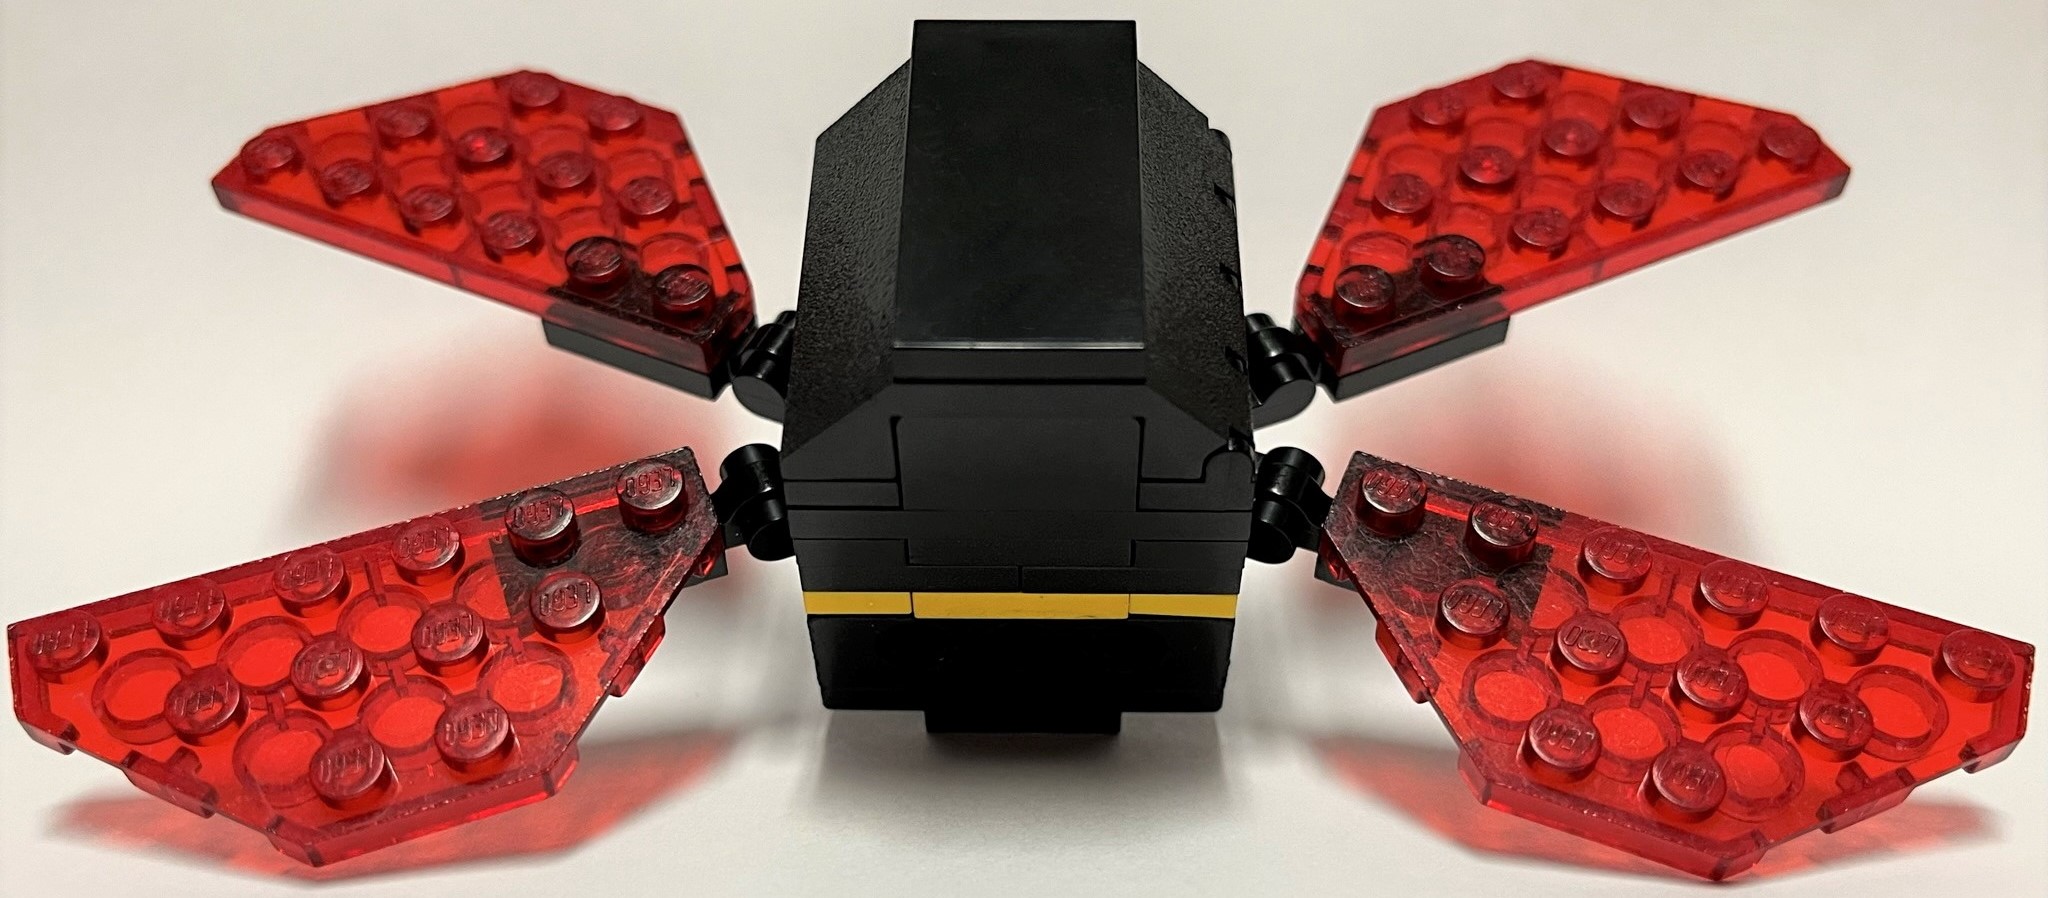
Here are some workable combinations for the different modules. Some of them kind of look like insects, don't you think?
The first two look like actual spaceships. The latter two look like a small, automated space station.
(Click on each picture for a full-size version)
Flaws
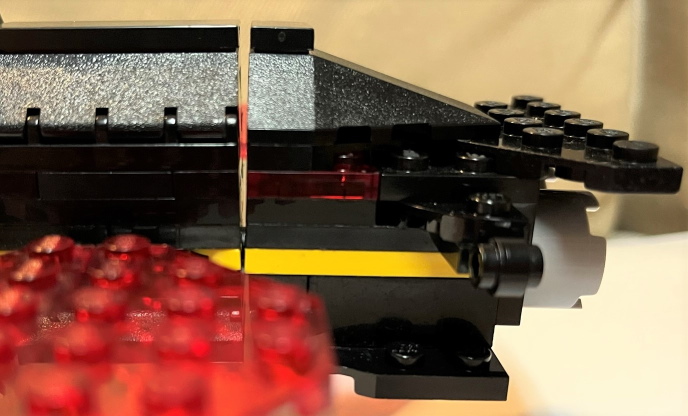
Opening the cargo bay doors this was brings out a flaw with the model where there is just a little bit of interference between the cargo bay doors (when opened) and the trans-red panels.
But this is not the biggest flaw. The biggest flaw that bugs me a little is with the two-pins to the Technic-1x4-brick-with-holes design used to link the modules together. Because the connection point is only at the bottom of each module, some gaps can form at the top. Now I see why LEGO decided to go with a different (but incompatible with existing Blacktron sets) connection mechanism that connects each modules at 3 points instead of two. However, I will retain the current connection system because I would have to lengten the build a bit to accommodate the new connection system (and will lose compatibility with the existing Blacktron system and only be compatible with the remake set 40580, which I do not have nor plan on getting.
(Click on each picture for a full-size version)

Conclusion
I LOVE this build. It's very swooshable and I am sure my younger self would've been thrilled back in the day.
I have accomplished all the (above-mentioned) wish list items in this model, and added more (such as the extra play features of the Communications Array/Solar panel module).
Interesting Links for Further Reading
The truth about SPACE! - by Mark Stafford (LEGO set designer) (External link to a PDF scan of a magazine article published in Brick Journal issue number 6)
Worthy of note: The article mentions drama at LEGO in the 1970s where a designer defected to a competitor planning to bring a space-based brick-building set before LEGO did (and could have changed history).
The OTHER company that released brick-based Space sets in 1978. (External link to a blog post about Hasbro Tente Astro)
Spoiler alert: That other company didn't last. LEGO Space prevailed; I believe it's because of the minifigures. :-)